Reminiscing the pretty past…

Well you know what I'm reminiscing, its not just me but a lot of them have been doing the same thing.

Hmm, where do I start? I accidentally came up on millions of food blogs from across the world when I was looking for the Kannada translation of a particular ingredient on Google. Up came Asha’s blog and from there a whole world of other blogs. I was amazed and impressed at the same time. I spent a day or two browsing through a few blogs, one link led to another and then another and then another!!! It was endless and then it struck me that I could have a food blog of my own too.

I had a blog before, containing all the poems I’ve written. I made it ‘invisible’ once I published my first book containing the poems. (You can look at my book here) I had almost given up on blogging because once I had filled the blog up with all the poems, I had nothing more to write about!! Accepting the fact that blogging wasn’t for me I had moved on till of course I was again brought into the blogging world, but for a different reason.

My passion for cooking is very recent found one…7 months ago if you had asked me if I liked to cook and wanted to have a blog, I probably would have given a nod in the negative. Well, I used to cook but was for the heck of it. It’s funny and amazing how things can change so quickly. The thought of having a new blog and at the same time getting to like cooking and experimenting, really got me started. Six months and 15 days later, here I am with 78 posts and a whole lot of blog buddies :)

Now I cook with passion and enjoy every bit of it, and it sure gives me pleasure sharing my recipes. A lot of them ask me what I get in return for having a blog, I say “ a whole lot of happiness, encouraging words from blog buddies, and the immense satisfaction that somewhere someone just might be trying out one of my recipes”. That certainly is good enough for me!

I’ve been putting off doing this post since the day Nupur announced the “Best of 2007” because I thought I wouldn’t have anything to write!! Look at me, rambling on like there’s no end..hehe

Ok, back to the post in all seriousness, following are 10 of my favourite recipes of 2007. I thoroughly enjoyed myself while making these dishes as well as photographing them. Oh, that was another thing I learned to do because of this blog….food photography. I’m still taking those baby steps, I know I will get there some day!


Best of 2007 – My 10 Favourite Recipes:

Trifle Pudding -- My favourite dessert of all time, simple and great tasting. Has some good memories associated with it.

Black Forest Cake -- Baked this for hubby dear’s birthday…his fav cake

Chocolate Cake -- This one was for a friend’s birthday….she sure was happy :)

Peas and Spinach Rolls --Mom’s recipe…My first attempt at it, and everybody loved it.

Vegetable Bajjis -- My mom-in-law’s recipe for a unique delicious bajji.

Pizza -- I made the pizza dough, mom was proud of me :)


Baath Masala Dosa with Bisi Coffee -- A new take on good old Masala Dosa and a refreshing cuppa filter coffee to wash it down!

Pineapple Gojju -- Granny rules..with this recipe

Santa Fe Wraps and Classic Mexican Tomato Salsa -- This was a prized find in a fabulous cookbook.

Enchiladas with Salsa Verde -- My hubby and I love this and I know I will be making this one over and over!

That was my account of the better half of the year 2007, I'm too lazy to think of what I'll do in 2008, so we'll let that pass for now.

This is headed to Nupur of One Hot Stove..thanks to her, we got to blow our trumpets!

Wishing all of you a very Happy & Prosperous 2008 !!

Pasta Frittata and Tomato Vegetable Pasta soup

The first time I saw Rachel Ray make a Frittata on Food Network, I was totally floored by the look of it. The thought of cutting into my food like a cake, was really fascinating. And better still was the way she slid the frittata from the pan to a flat surface, looked like a delicious savory pie! I couldn't try the one she made on the show that day because it had meat in it, but was I glad when I found a similar recipe in her "Everyday with Rachel Ray" magazine. I had no excuses not to try this one!!


Pasta Frittata: (serves: 4)


You will need:


7 large Eggs

3 oz Mozzarella cheese cubed (about 1 cup)

½ to ¾ cup Grape tomatoes halved (I used regular tomatoes cubed)

½ cup fresh basil leaves, chopped

¼ cup grated parmesan cheese

Salt and pepper

2 tbsp Olive Oil

1 cup leftover cooked pasta with sauce (I used left over tri-coloured Rotini with Marinara sauce)


Preheat oven to 350 F. Beat eggs and then stir in the mozzarella, tomatoes, basil and parmesan. Season with salt and pepper. Heat olive oil and cook the pasta for a minute with the sauce. Now add the egg mixture and cook until the edges begin to firm up. Draw the cooked edges toward the centre of the pan letting the raw egg flow towards the edge of the pan. Continue until frittata is almost set but slightly runny in the centre, about 4 minutes. Transfer to the oven to finish cooking, about 10 mins. Remove from oven and let sit 5 minutes.


Using a rubber spatula cut the frittata into wedges and serve hot or at room temp.


Want more pasta frittata....try this...Eggs and Pasta Frittata

Tomato Vegetable Pasta Soup


Another recipe from Rachel's food mag to beat the winter chill!


You will need:


2 tbsp Olive Oil

1 Zucchinni grated using the large holes of a box grater

2 carrots, peeled and grated using large holes of a box grater

1 onion, chopped

4 ribs celery, chopped

1 bay leaf

Salt and pepper

4 cups veg broth

1 28oz can crushed tomatoes

1 15.5 oz chickpeas

2 jarred roasted red bell pepper, chopped

½ lb Penne

¼ cup store bought pesto


Heat the olive oil in a pan. Add the zucchini, carrots, onion, celery and bay leaf. Season with salt and pepper and cook for 8 mins, stirring with a wooden spoon. Stir in the broth, tomatoes, chickpeas and bell peppers, cover and bring to a boil.


When it begins to boil, add the pasta and cook for 12-15 mins until al dente. Stir in the pesto which helps thicken the soup. Taste and season accordingly. Discard bay leaf and serve.


If you can't find pesto, use Tomato paste as the thickener. Stir it in with the tomatoes and broth.


I served the soup with some Cheesy Garlic Bread ...the store bought ones...it was a satisfying mini meal for a cold rainy evening.

Santa Fe Wraps and Classic Mexican Tomato Salsa

I have always wanted to make good tasting Salsa to go along with Tortilla chips to satisfy my hunger pangs. I know, not a very healthy snack but absolutely mouth watering. I was not satisfied with my previous attempts at making home made Salsa, until I lay my hands on "Red Hot: A Cook's Encyclopedia of Fire and Spice".

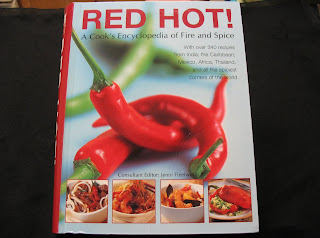
As I had promised in my previous post here's a picture of the book. I would say its a must own for spicy food lovers.It has all the information you need about chillies and over 300 recipes using chillies of various kinds.

Classic Mexican Tomato Salsa is from this book. I served it with Santa Fe wraps and Tortilla chips.

Santa Fe Wraps

Simple finger food for a party or just to satisfy that 'snack' hunger pang!

You will need:

½ cup Sour cream
½ cup Softened Crème Cheese
¼ cup Frozen Corn (thawed)
2 tbsp Celery finely chopped
½ cup Tomato finely chopped
1 1/2 tbsp Hot sauce (Recommended : Tobasco)
Salt and Pepper
3-4 Tortillas
Toothpicks

Blend all the ingredients in a bowl to make a smooth mixture. Cover and chill for an hour to let flavours combine.

Spread an even layer of this mixture on one side of a tortilla. Roll tortilla gently to make a tight roll. Prick toothpicks at intervals on the roll and cut in between to make individual sized wrap pieces.

Serve alongside Salsa Verde and Classic Mexican Tomato salsa. The celery gives a nice crunch and the corn adds a bit of sweet amidst the tang and spice.

Spirals of Flavour

You can add our own choice of filling, like chopped jalapenos, blackbeans or a little bit of the salsa itself.

Classic Mexican Tomato Salsa

You will need:

3-5 Fresh Serrano Chillies (use 3 for medium heat and more for hot)
1 large white or red onion
Juice from 2 Limes and the grated rind
8 ripe, firm tomatoes
Large bunch of fresh coriander
¼ tsp Sugar
Salt

To peel the chillies, spear them on a metal skewer and roast over the flame of a gas burner until the skins blister and darken. Do not let the flesh burn. Place the roasted chillies in a strong plastic bag, tie the top of the bag to keep the steam in. Set aside for 20 minutes.

Meanwhile finely chop the onion and put it in a bowl with the lime juice and rind. The lime juice will soften the onion.

Remove the chillies from the bag and peel off the skins. Cut the stalks and slit the chillies. Scrape the seeds with a sharp knife. Chop the flesh roughly and set aside.

Cut a small cross in the base of each tomato. Place the tomatoes in a heatproof bowl and pour over boiling water to cover. Leave the tomatoes for 3 minutes and immediately remove and run under cold water. The skins will have begun to peel back from the crosses, remove the skins completely.

Dice the peeled tomatoes and put them in the bowl with the chopped onions. Add chopped coriander, salt,sugar and chopped chillies. Mix to combine. Cover and refrigerate for 2-3 hours to allow the flavours to come together. The salsa will keep for 3-4 days in the fridge.

Classic Mexican Tomato Salsa

Serve alongside Tortilla chips or Santa Fe wraps.

Update:

I'm sending this over to "Best of 2007- Food blogger's recipe collection" as my Best Recipe for this year.

Festive Chocolate Fruit and Nut Squares


For the first time ever, I think I'm really into the festive season with all the baking and cooking. Anywhere you go its all 'Christmassy' ...lights, colours, decorations, gifts and not to forget the various holiday 'sale's. Even all the channels on tv are decked up for the season. Hard to avoid all the cheer!

Well whatever the reason, I just a need an excuse to cook or bake and share it with friends.

After the cookies I decided to make these Festive Chocolate Fruit and Nut Squares. Sweet and dark chocolate with dried fruits and toasted nuts, a feast to the palette.


You will need:

9 1/2 ounces semisweet chocolate, finely chopped
8 ounces bittersweet chocolate, finely chopped
1 cup whole or split roasted, salted cashews
1 cup chopped dried apricots
1/2 cup chopped dried plums
1 tsp Orange zest plus more for garnish

Melt the 2 chocolates in a heatproof bowl set over a pan of simmering water.

Meanwhile, line a cookie sheet with parchment paper. Using a ruler and a pencil, draw a 9 by 10-inch rectangle on the paper. Turn the paper face down on the baking sheet.

Pour the melted chocolate over the paper and spread to form a rectangle, using the outline. Sprinkle the cashews, apricots and plums over the chocolate. Also sprinkle the orange zest on top.

Set aside for 2 hours until firm. Cut the chocolate into squares and serve at room temperature.

Stacked up!

You can use any dried fruits you have on hand..cranberries, pineapples...your choice.

Festive Chocolate Fruit & Nut Squares is my entry to the event "AFAM - Dry Fruits" hosted by Latha of The Yum blog.

Also, the picture below is my entry to Bee & Jai's "CLICK - Show us Your Nuts"


Happy Holidays everyone!! :)

Update:

This is also an entry to Bindiya's event "These are a few of my favourite things -- Chocolate".


Apple Cake Tatin


Tarte Tatin is an upside-down apple tart in which the apples are caramelized in butter and sugar before the tart is baked.


Tradition says that the Tarte Tatin was first created by accident at the Hotel Tatin in Lamotte-Beuvron, France. The hotel was run by two sisters, Stéphanie and Caroline Tatin. There are conflicting stories concerning the tart's origin, but the predominant one is that Stéphanie Tatin, who did most of the cooking, was overworked one day. She started to make a traditional apple pie but left the apples cooking in butter and sugar for too long. Smelling the burning, she tried to rescue the dish by putting the pastry base on top of the pain of apples, quickly finishing the cooking by putting the whole pan in the oven. After turning out the upside down tart, she was surprised to find how much the hotel guests appreciated the dessert.

Apple Cake Tatin


Apple Cake Tatin is a cake made like a Tarte Tatin, except this is a cake and not a tart. Also the apples are not sauteed but rather covered in caramel and then baked.


You will need


6 tbsp (3/4 stick) unsalted butter, at room temperature, plus extra for greasing the dish
1 1/4 Granny Smith apples, peeled and sliced into 12 pieces
1 3/4 cups granulated sugar, divided
2 extra-large eggs, at room temperature
1/3 cup sour cream
1/2 tsp grated lemon zest
1/2 tsp pure vanilla extract
1 cup plus 2 tablespoons all-purpose flour
1/2 tsp baking powder
1/4 tsp salt
Confectioners' sugar

Preheat the oven to 350 degrees F.

Generously butter a 9-inch glass pie dish and arrange the apples in the dish, cut side down.

Combine 1 cup of the granulated sugar and 1/3 cup water in a small saucepan and cook over high heat until it turns a warm amber color. Swirl the pan but don't stir. Pour evenly over the apple slices.

Meanwhile, cream the butter and the remaining 3/4 cup of granulated sugar until light and fluffy. Lower the speed and beat in the eggs 1 at a time. Add the sour cream, zest, and vanilla and mix until combined. Sift together the flour, baking powder, and salt and, with the mixer on low speed, add it to the butter mixture. Mix only until combined.

Pour the cake batter evenly over the apple slices and bake for 30-40 minutes, unitl a cake tester or a tooth pick comes out clean. Cool for 15 minutes, then invert the cake onto a flat plate. If an apple slice sticks, ease it out and replace it in the design on top of the cake. Serve warm or at temperature, dusted with confectioner's sugar and a scoop of Vanilla ice cream.


The not so sweet cake is complimented by the caramel topping. Dusting with confectioner's sugar just before serving makes it fancy. I also added lemon zest on top to accentuate the lemon flavour in the cake. All in all, a pleasant light dessert.

Apple Cake Tatin is my entry to "Fresh Produce of The Month: Apples" hosted by Marta of Italian in the US.

Chocolate Hazelnut Cookies

"...'Tis the season to be jolly...fa la la la la la la ..."


Ever since Susan of Food Blogga announced the "Eat Christmas cookies" event, I've been truly enjoying this season.


There is so much Christmas cooking and baking all around that it is simply hard not to tie that apron and bake a few goodies myself. I hadn't baked a cookie before until I made the Butter and Jam Cookies (thumbprints). It wasn't long before I had the urge to try more cookies.


I love Ferrero Rocher chocolates, whole roasted hazelnut encased in a thin wafer shell filled with nutella/hazelnut cream and covered in milk chocolate and chopped hazelnuts...pure bliss! The combination of chocolate and hazelnuts spells only one thing for me...delicious! Hence, in my quest for a cookie recipe containing the same ingredients, I came upon this one.

Chocolate Hazelnut Cookies


You will need: (Makes 36 cookies)

1 1/3 cups all-purpose flour
1/2 tsp baking powder
1/2 tsp baking soda
1/4 tsp salt
1/2 cup butter, softened
1/2 cup chocolate hazelnut spread (recommended: Nutella)
1/2 cup sugar
1/2 cup brown sugar
1 egg
1 tsp vanilla extract
3/4 cup chopped toasted hazelnuts


Preheat the oven to 375 degrees F.

In a medium bowl combine the flour, baking powder, baking soda, and salt. Set aside.

In another medium bowl combine the butter, chocolate hazelnut spread, sugar, and brown sugar. Using an electric mixer, cream the ingredients together, about 4 minutes. Add the egg and vanilla and beat until smooth, about 1 minute. Using a wooden spoon or rubber spatula, stir in the flour mixture until just combined. Add the hazelnuts and stir until just combined.

Usins a tablespoon measure, spoon out the cookie dough onto a cookie sheet, spacing the mounds about 4 inches apart. Use a fork to flatten the cookie dough. Bake until lightly golden around the edges, about 10-12 mins. Use a metal spatula to transfer to a wire rack and let cool completely. Store in an air tight container.

I decided to send the cookies to 3 of my friends living in other cities. Since I had to mail them, I couldn't do a fancy wrap, but instead packed them well in a good food container. I haven't told any of them what's coming in the mail...so it's gonna be a pleasant surprise :)

Chocolate Hazelnut Cookies is headed to "Eat Christmas Cookies" event at Food Blogga

Enchiladas with Salsa Verde(Green Sauce), Spicy Black Beans and Mexican Salsa:


We both love Mexican food (I know I've said this a lot already..hehe) and whenever we go to authentic Mexican restaurants, we both order Enchiladas topped with the green sauce. This sauce is so much spicier and tastier than the Red sauce.

Green sauce is the name of several different sauces containing mainly herbs, namely the Italian salsa verde, the French sauce verte

The basic recipe is probably from the Near East and, as such, is probably at least 2,000 years old. Roman legionaries brought it to Italy, from where it was exported to France and Germany. Evidence suggests that it was introduced in Frankfurt am Main by the Italian trading families Bolongaro and Crevenna around 1700. The German variant uses a different mix of herbs, since Mediterranean herbs were not available in Germany at the time.

Green sauces are common in Mexican and Mexican-American cuisines. The basis of the green sauce (known as salsa verde) is either tomatillos, serrano chiles, coriander leaves (also known as cilantro), or some combination of these. It may be warm, as in a chile verde, or cold, as a condiment. In Mexican-American cuisine, a green sauce is frequently used as a dip for tortilla chips. Most Tex- Mex restaurants serve enchiladas and burritos topped with this green sauce, also called Salsa Verde.

The recipes for the Green Sauce, Spicy Black Beans and the Mexican Salsa are from the book “Red Hot: A Cook’s Encyclopedia of Fire and Spice” by Jenni Fleetwood. Two other recipes from this book are Red Enchilada Sauce and Egg and Green Lentils curry with Ginger and Chillies.


Cheese & Onion Enchiladas with Salsa Verde

Tomatillo Chile Salsa: (Salsa Verde/Green Sauce)

You will need:

4 medium tomatillos, husked and rinsed
2 jalapenos, stemmed
1/2 medium onion, peeled and quartered
2 garlic clove, peeled
1 handful fresh cilantro leaves, coarsely chopped
1 lime, juiced
1 teaspoon toasted cumin seeds
Kosher salt


Bring a pot of water to a boil; add the tomatillos, jalapenos, onion, and garlic. Simmer for 10 to 15 minutes, until the tomatillos are soft. Drain and cool slightly, then put them in a blender. Add the cilantro, lime juice, and cumin. Puree for a few seconds to blend, and then pour in about a 1/4 cup of water and process to a coarse puree; taste and season with a generous pinch of salt. You should have about 2 cups of this salsa verde.


Cheese & Onion Enchiladas

You will need:

6 Flour Tortillas (store-bought)
1 cup grated Sharp Cheddar cheese (white or yellow)
1 ½ cups chopped yellow onion

Preheat oven to 350 F.

Take the flour tortillas and lightly toast each one on a hot pan, till piping hot. Take one tortilla, place 3 tbsp of chopped onions on one end and place grated cheese over the onions. Tightly roll and place the enchilada crease side down in a greased baking dish. Repeat with all the tortillas.

Pour Salsa Verde over the rolled tortillas, cover completely. Spread remaining grated cheese on top.

Bake for 15 minutes. Serve hot with Spicy Black Beans. You can top the Enchiladas with a dab of sour cream and chopped coriander.

You can substitute the cheese with veggies of your choice, cube the veggies, sauté till half done and roll in tortillas with cheese. Bake for 25 minutes to let veggies cook through completely.


Spicy Black Beans


You will need:

2 cups canned Black Beans
3 tablespoons extra-virgin olive oil
1/2 medium onion, diced
1 jalapeno pepper, chopped
2 cloves garlic, chopped
1 bay leaf
Salt and black pepper

In a pan, heat the olive oil. Add the onion, jalapeno pepper, garlic, and bay leaf and cook until the vegetables begin to soften, about 5 minutes. Add the beans and toss. Remove the bay leaf and discard. Season with salt and pepper and serve.

Mexican Salsa:


You will need:


1 fresh hot green chilli chopped

1 clove Garlic

½ red onion coarsely chopped

3 Spring onions (scallions) chopped

½ cup fresh coriander leaves

1 ½ lb Ripe Tomatoes

1-3 Canned green chillies

1 tbsp Olive Oil

2 tbsp Lemon juice

Salt to taste

3 tbsp Water


In a food processor or blender combine the fresh chilli, garlic, red onions, scallions and coriander leaves. Process until everything is finely chopped. Add the remaining ingredients and pulse till the mixture is well combined and still chunky. Taste for seasoning. Let stand 30 minutes before serving with Tortilla chips or along side Enchiladas.


I still haven't got a chance to take a picture of the cook book, will surely do it the next time I post a recipe from there :)


Akki Rotti with Ennegayi (Steamed Rice Rotis with Eggplant Curry)

Akki Rotti is a specialty in Karnataka. Akki is the Kannada translation for Rice. There are two ways to make Akki Rotti, one is to use rice flour in a dough like form with chopped onions and chillies, patted onto pans and roasted to a crisp served with various condiments. Another way is to steam the rice flour in a open pan with water, made in to a dough and then rolled like chapathis with a rolling pin. This tastes a lot different from the former. But this doesn't stop either from being a household favourite for any kannadiga.


Akki Rotti


You will need:


1 ¾ cups Rice flour

¼ cup Whole Wheat flour

1 tsp Salt

3 Cups Water

1 tsp Oil


Mix wheat flour and rice flour. Bring water to a boil. Add salt and oil. Place wooden spoon (handle side in the water) in the middle and add the flour in the centre to form a peak. Do not stir.Reduce heat to low and simmer for 15 minutes.


Remove from heat and stir quickly with the help of the wooden spoon to make a lump less soft dough. While its still hot transfer to a lightly oiled plate or surface and knead well. The more you knead the easier it will be roll into rottis.


Make small balls and flatten it using a rolling pan. Dredge in rice flour when dough gets sticky or hard to roll. Toast on a hot pan on both sides. Serve hot with Ennegayi.


Ennegayi or Guthavankaya


Ennegayi is in Kannada and Guthavankaya is in Telugu. Ennegayi is famous in North Karnataka as well as in the coffee estates of serene Coorg down south. Guthavankaya is the typical Andhra favourite. There are many ways to make this dish and whatever the method, the end result should be a spicy lip smacking Eggplant curry.


Ennegayi is usually had with Jowar Rottis, but the curry goes well with almost any such rotti.


My mom-in-law taught me how to make this curry.


You will need:


6-8 Small Egg plants, washed and wiped dry

2 tsp White Sesame seeds

2 tsp Corriander seeds

6-7 dry red chillies

¼ cup Grated fresh coconut

2 tbsp Fried Gram (Hurgadale)

4 tbsp Oil

1 tsp Mustard seeds

Few curry leaves

A pinch Asafetida (hing)

Salt to taste

2 Cups Water


Cut Eggplants in a X in the centre till the stem, so that the eggplant remains intact as a whole. Dry toast the sesame seeds, coriander seeds and the dry red chillies. Cool and grind to a fine powder in a blender. Add the grated coconut and fried gram and make a smooth paste using water as required.


Fill the cut eggplants with a little of the ground paste. This helps flavour the eggplants as they cook.


Heat oil in a pressure cooker. Add the mustard seeds, hing and curry leaves. When the mustard begins to splutter add the ground masala paste and fry for 2-3 minutes. Add the filled eggplants, salt and water enough to cover the eggplants. Close lid and place weight on the cooker. Let cook on medium high heat for 2 whistles. Turn off heat, stir, check for seasoning and serve with Akki Rottis.


Blog Widget by LinkWithin