Daring Bakers –Macaroons/Macarons

The 2009 October Daring Bakers’ challenge was brought to us by Ami S. She chose Macarons from Claudia Fleming’s The Last Course: The Desserts of Gramercy Tavern as the challenge recipe.

In the United States, the term “macaroon” generally refers to a cookie made primarily of coconut. But European macaroons are based on either ground almonds or almond paste, combined with sugar and egg whites. The texture can run from chewy, crunchy or a combination of the two. Frequently, two macaroons are sandwiched together with ganache, buttercream or jam, which can cause the cookies to become more chewy. The flavor possibilities and combinations are nigh endless, allowing infinitely customizable permutations.

I have never tasted a Macaroon so making one had never been on my list, until now. So this was indeed a challenge and though the recipe is simple, the process is labor intensive. I had to make two batches because the first one was far from my expectations – in other words a major Macaroon flop! Being a Daring Baker means pushing your limits even if it means trashing an entire batch and starting all over. (I’m guilty!) But the efforts are well worth it.


I had my macaroon shells ready, but didn't get a chance to fill them and take pics before I headed out to Michigan for the week. This morning the first thing on my list was to make the filling and start clicking.

Recipe Source: Claudia Fleming’s The Last Course: The Desserts of Gramercy Tavern

Preparation time: Not taking into account the amount of time it takes for you to bring your egg whites to room temperature, the whole baking process, including making the batter, piping and baking will probably take you about an hour to an hour and a half. How long it takes to make your filling is dependent on what you choose to make.

Actual baking time: 12 minutes total, plus a few minutes to get your oven from 200°F to 375°F.


Variations allowed: Fleming’s recipe calls for almond flour, but you can grind the nuts yourself if you are feeling ambitious or can’t get a hold of almond flour. (It is available at many online sources, however.) If you do grind the nuts yourself, be sure to add at least a cup of the powdered sugar with the nuts before grinding. This keeps them from turning into almond butter. Grind the nuts as fine as possible in your food processor. Maida Heatter suggests grinding nuts for at least 60 seconds, or longer than you think you need. They need to be extremely fine—powdery, in fact, like flour. If using almonds, try and hunt down blanched or skinned almonds. This helps with the texture and color. You might also consider toasting your nuts ahead of time and rubbing off the skins in some clean toweling. I made my own Almond meal at home.

Flavor & Fillings: We were allowed to choose flavorings and filling of our choice. Filling had to be made from scratch.

Equipment required:
• Electric mixer, preferably a stand mixer with a whisk attachment
• Rubber spatula
• Baking sheets
• Parchment paper or nonstick liners
• Pastry bag (can be disposable)
• Plain half-inch pastry bag tip
• Sifter or sieve
• If you don’t have a pastry bag and/or tips, you can use a Ziploc bag with the corner snipped off
• Oven
• Cooling rack
• Thin-bladed spatula for removing the macaroons from the baking sheets
• Food processor or nut grinder, if grinding your own nuts (ouch!)

Ingredients
Confectioners’ (Icing) sugar: 2 ¼ cups (225 g, 8 oz.)
Almond flour: 2 cups (190 g, 6.7 oz.)
Granulated sugar: 2 tablespoons (25 g , .88 oz.)
Egg whites: 5 (Have at room temperature)

The 'feet' on the Macaroon

Directions:

1. Preheat the oven to 200°F (93°C). Combine the confectioners’ sugar and almond flour in a medium bowl. If grinding your own nuts, combine nuts and a cup of confectioners’ sugar in the bowl of a food processor and grind until nuts are very fine and powdery.
2. Beat the egg whites in the clean dry bowl of a stand mixer until they hold soft peaks. Slowly add the granulated sugar and beat until the mixture holds stiff peaks.
3. Sift a third of the almond flour mixture into the meringue and fold gently to combine. If you are planning on adding zest or other flavorings to the batter, now is the time. Sift in the remaining almond flour in two batches. Be gentle! Don’t over fold, but fully incorporate your ingredients.
4. Spoon the mixture into a pastry bag fitted with a plain half-inch tip (Ateco #806). You can also use a Ziploc bag with a corner cut off. It’s easiest to fill your bag if you stand it up in a tall glass and fold the top down before spooning in the batter.
5. Pipe one-inch-sized (2.5 cm) mounds of batter onto baking sheets lined with nonstick liners (or parchment paper).
6. Bake the macaroon for 5 minutes. Remove the pan from the oven and raise the temperature to 375°F (190°C). Once the oven is up to temperature, put the pans back in the oven and bake for an additional 7 to 8 minutes, or lightly colored.
7. Cool on a rack before filling.

Once I piped the shells onto the sheets, I let them sit for 2 hours before baking them. I was super thrilled to see 'feet' on my macaroons. Though the recipe is simple, getting it right is a definitely a challenge. And after the first 'mac' failure, the 'feet' felt like they were God-sent :D I also colored the batter with orange food color, to depict fall. But once the almond mix was in, it kinda toned down the color a lot.

Yield: 3 dozen.


Crisp and evenly done


I chose to make a coffee flavored filling. My friends and hubby are big time coffee lovers, so I knew they would enjoy this.


Coffee flavored Chocolate Ganache:

You will need:

1 cup milk/dark chocolate morsels

1/2 cup heavy whipping cream

2 tsp Instant espresso powder (vary to suit taste)

Place chocolate morsels in a heat proof bowl. Heat the cream until it starts to boil. Stir in the espresso powder and immediately pour over the chopped chocolate. Let sit for a minute and stir with a spatula until smooth. Cool and let it set in the refrigerator for about an hour. Spoon (or pipe)about a tablespoon on one macaron and sandwich it using another on top.

Storing: Unused Macaroons can be frozen for up to 3 months and filled Macarons can be stored in a container for 2 days on the counter, and for up to a week in the refrigerator.

The Macaroons were too sweet for me and I may not make these again. I did learn a lot and who knew a simple recipe would be so hard to master?

Thanks to Ami S for a truly wonderful challenge!

Veggie Lasagna in a Thyme Sauce


I don't want to start another post talking about the weather,but I do think its a good way to start by letting you all know what's happening in our part of the world. So on that note, the weather has been pretty finicky here...sometimes cold and sometimes very pleasant like today. There, I did it again!! :D The weather..oh weather!


Now back to the food. Every time we go to an Italian restaurant, I wish I could have the Lasagna -- probably the one dish I haven't tried in a restaurant since it contains meat. And having been to a lot of Italian restaurants, I know there is no Veggie Lasagna out there. That kinda motivates me to make Lasagna at home with my own "loaded with veggies" sauce. The first time I made Veggie Lasagna was for the DB challenge several months ago. That was with made from scratch pasta, but this time I just took the easy way out and used store bought dry pasta. The sauce is chunkier with more veggies and white beans. Fresh Thyme makes the Lasagna taste and smell wonderful.


You will need:

For the Thyme Vegetable Sauce:

3 tbsp Olive oil

1 Red onion, cubed

3 cloves garlic, minced

1 Green bell pepper, cubed

½ cup Sliced Mushrooms

½ cup diced Carrots

½ cup Frozen Peas, thawed

2 tsp Red chilli flakes ( adj to taste)

2 cups store-bought marinara sauce

4 stems fresh thyme, about 2 tbsp (leaves)

1 cup canned White beans, drained and rinsed

Salt to taste


For the Lasagna:

6-8 lasagna sheets from a box

Bechamel sauce (recipe follows)

2 cups shredded Mozzarella

¼ cup grated Parmesan


Bring a pot of water to boil the lasagna sheets in. Salt the water and drop in the sheets. Stir and let cook for 8 minutes. Drain and reserve.


While the pasta cooks, prepare the vegetable sauce. Heat olive oil in a pan. Add the garlic and chopped onion. Saute till onions are soft. Add the bell peppers, mushrooms, carrots and peas. Cook on low heat till all the veggies are done. Add the chilli flakes, fresh thyme and cook till the thyme is fragrant, about a minute. Stir in the marinara sauce and the drained white beans. Add ½ cup of water and bring the sauce to a boil on medium heat. Season with salt. Turn off heat.


Bechamel Sauce:

A few months ago one of the Daring Baker challenges was Spinach Pasta made from scratch and used in a Lasagna. I chose to make the same Bechamel sauce because it tasted great. The sauce adds a whole lot of flavour and makes the entire lasagna irresistible…really!


You will need:

2 tablespoons unsalted butter
2 tablespoons All purpose flour

1 & 1/3 cups (approx 570ml) milk
Salt and freshly ground pepper to taste
Freshly grated nutmeg to taste


Using a medium-sized saucepan, melt the butter over low to medium heat. Sift over the flour, whisk until smooth, and then stir (without stopping) for about 3 minutes. Whisk in the milk a little at a time and keep the mixture smooth. Bring to a slow simmer, and stir 3 to 4 minutes, or until the sauce thickens. Cook, stirring, for about 5 minutes, until the sauce thickens. Season with salt, pepper, and a hint of nutmeg.


Assembling the Lasagna:


Take an 8x8 inch glass pan. Preheat oven to 400F. Place a layer of lasagna sheets, about 3, side by side. Spread about two tablespoons of the Bechamel sauce on top. Sprinkle with about a teaspoon of grated Parmesan. Spread about ¼ cup of vegetable sauce. Repeat the layers – lasagna sheets, Béchamel sauce, Parmesan and Vegetable sauce. The top most layer should be lasagna sheets.Sprinkle with remaining Parmesan and top off with shredded mozzarella.


Bake for 15-20 minutes until the cheese is bubbly .Let sit for a few minutes before serving.


Celebrating Diwali with a cake

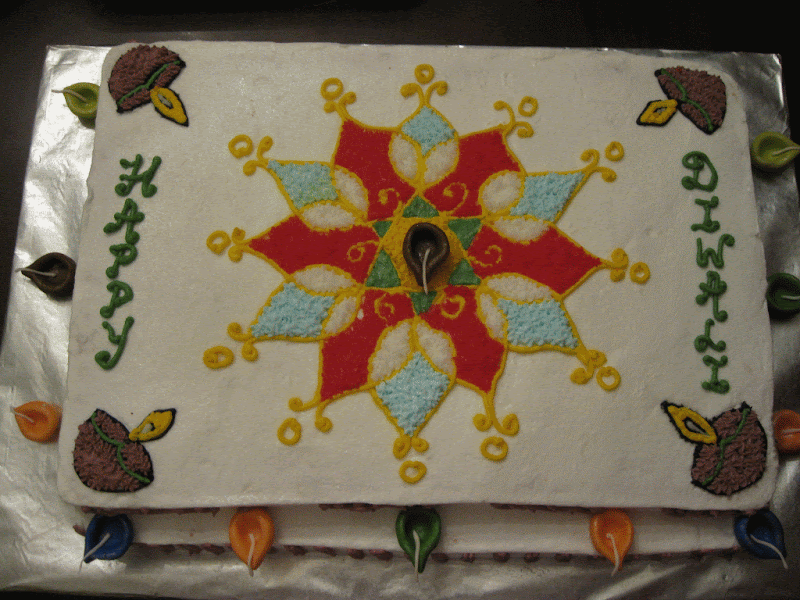
Hope all of you had a wonderful and safe Diwali. We had a great time with friends at a potluck party and I took a Diwali themed cake. I had been meaning to try something traditional on cake, something you don't see often. Here is my Diwali creation.


Its a strawberry cake with buttercream icing and decorations.


The lamps are made out of Fondant and are completely edible, wick and all.


Apple Walnut Cake with Sugar Glaze

Two weekends ago, a couple of friends and us went Apple picking in Ellijay, GA, around 80 miles north of where we live. I have never been picking before so this was a fun and memorable experience. My first time in an Apple Orchard too, so I was super thrilled.


My friend and I were so eager to pick, we couldn't resist even after our bag was pretty full! We picked Golden Delicious and Gala apples. The apples looked gorgeous and so inviting, waiting to be plucked, and were a sight to see!


We've been munching on these picked fruits the past week and still have plenty left. I am not big on Apple Pie so I made something I'm more familiar with and love hands down..cake..Apple Walnut Cake.


Apple Walnut Cake:
You will need:

1 1/4 cup all-purpose flour, stir before measuring
1 cup whole wheat flour
3/4 cup granulated sugar
1 cup light brown sugar, packed
1 tablespoon ground cinnamon
2 teaspoons baking powder
1 teaspoon salt
1/2 teaspoon baking soda
3/4 cup vegetable oil
1 teaspoon vanilla
3 eggs
2 cups finely chopped apples
1 cup chopped walnuts
Vanilla Glaze, recipe below

In a large mixing bowl, blend all ingredients except chopped apples and walnuts with electric mixer. Stir in chopped apples and nuts. The batter will be thick. Spread into a generously greased and floured 10-inch Bundt cake pan or tube pan. I used a Silicone pan, which needs no greasing. Bake at 325° for 55 to 65 minutes, until a wooden pick inserted in center comes out clean. Cool in pan for 15 minutes; turn out onto serving plate to cool completely. Drizzle with a vanilla glaze.


Vanilla Glaze:
You will need:

1/2 cup confectioners' sugar
1/4 teaspoon vanilla
1 tbsp milk plus more if required

Blend all ingredients until smooth. Add more milk if needed to achieve a pouring consistency. Drizzle over cake.


The cake was moist and flavorful but the apple flavour didn't shine through as much as I expected. I would probably add more apples the next time.

Omlet with White Beans & Sesame seeds


The past few days have been gloomy with the skies overcast with rain clouds. It felt great to wake up to a bright sunny day and a blue sky this morning. Definitely sets the mood for the day.


Hubby dear usually comes home from work for lunch, today he called to say he was way too busy in meetings to come home, so it was just me. I hadn't planned what to make and was not quite eager to make anything elaborate. Moreover I wanted a break from the usual rotis and rice. So I made a hearty omlet with white beans topped with toasted sesame seeds. It made for a perfect meal for one.


You will need:


1 tbsp Olive Oil

1 tsp Sesame Oil

1 Onion, chopped

1 Small Red Bell pepper, chopped

1 Celery Rib, chopped

1/2 cup Cannellini (white) Beans, drained and rinsed

2 Eggs

1 tsp Sesame Seeds

1/2 tsp Red chilli flakes

Salt and Pepper


Preheat oven to 300F.


Heat the olive oil and sesame oil in a 6-inch oven proof pan. (Cover the handle with foil if you are not sure about the pan) Add the onions, pepper and celery. Cook until soft and done. Add the beans and continue to cook for several minutes to heat through.Sprinkle with red chilli flakes and season with salt and pepper.


In a medium bowl, beat the eggs with a fork and season with salt and pepper. Pour over the ingredients in the pan. Stir the egg mixture with a flat wooden spoon until it begins to stiffen. Allow to firm up over low heat.


Sprinkle the omlet with the sesame seeds and place the pan in the oven. Heat for 5 minutes and then turn on the broiler. Brown the seeds evenly and then remove from oven.


Cut the omlet into wedges and serve immediately.


The crunch from the sesame seeds was great and the hint of sesame oil made it different from the usual omlet. Not bad for a quick, on the spur meal!

Strawberry Panna cotta


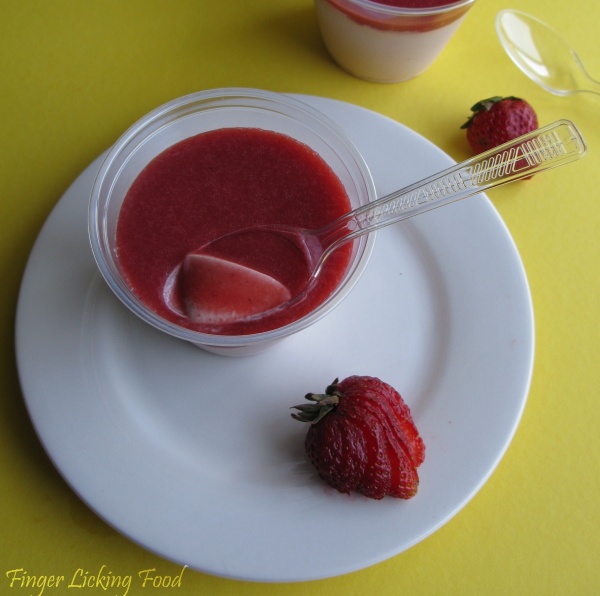
Panna cotta is an Italian dessert made with cream, milk and sugar and a setting agent, usually gelatin. I have seen many flavours of this dessert on several blogs and was waiting for an occasion to make some. I did get a chance when a friend had us over for dinner a couple of weeks ago, and I took dessert.


A few months ago when I had a huge stash of fresh strawberries (courtesy : hubby’s travel to CA) I had pureed the soft ones and froze it. I found a simple recipe for Panna cotta on Food Network by Giada de Laurentiis. I modified it a little to make Strawberry Panna cotta with fresh strawberry puree.


You will need:


1 cup whole milk

1 tablespoon unflavored powdered gelatin

3 cups whipping cream

1/3 cup honey

1 tablespoon sugar

1 cup Fresh strawberry puree plus more for topping

Pinch salt

Place the milk in a small bowl. Sprinkle the gelatin over. Let stand for 3 to 5 minutes to soften the gelatin. Pour milk mixture into a heavy saucepan and stir over medium heat just until the gelatin dissolves but the milk does not boil, about 5 minutes. Add the cream, honey, sugar, and salt. Stir until the sugar dissolves, 5 to 7 minutes. Remove from the heat. Stir in the strawberry puree. Pour into cups or glasses. Cool slightly. Refrigerate until set, at least 6 hours.

To make it more ‘strawberrier’ I poured fresh strawberry puree on top of the set panna cotta. The puree was slightly tart which cut the sweetness of the panna cotta.

This dessert was incredibly creamy and the honey added just the right amount of sweetness.

Restaurant-style Green Peas(Mattar) curry


Cooking was never an imperative part of my life while growing up. Though I was constantly surrounded by food and restaurateur parents, I was not very keen on learning to cook. I’ve probably cooked a whole lot in the past two years than I have in my entire adult life!

Now that I think back, I wish I had paid more attention to mom’s words of cooking wisdom and her excellent recipes. If I had, then I probably would have discovered my passion for cooking much sooner. As they say, better late than never, I am still grateful I can ask mom for recipes and savor them here, thousands of miles away. One dish mom made often and exceptionally well was the Green Peas(Mattar) Curry. This curry also happens to be my Dad’s favourite and he never failed to order this when we ate out. He could polish off an entire dish of the curry with no accompaniments whatsoever!The same happened when mom made it at home too.


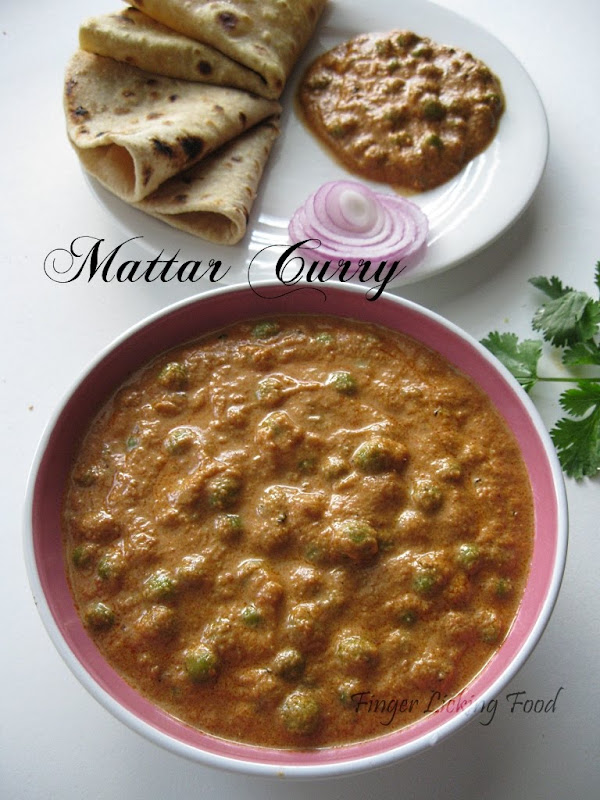
The other day, I was struck with this overwhelming nostalgia of Dad's f'inger licking' favourite, literally. I just had to make this curry to feel better :) I'm glad I did, this was a feast to the taste buds as well as a wonderful trip down memory lane.


You will need:


2 Cups Fresh Green peas, boiled

½ cup Onion paste (raw)

1 tbsp Ginger Garlic paste

1 ½ cups Tomato puree (Made from about 3 large tomatoes)

3 tbsp Cashew bits, soaked and ground to a smooth paste

¼ cup heavy whipping cream

2 tbsp Oil

2 Whole cloves

2 Whole cardamom pods

1 inch piece Cinnamon

¼ tsp Turmeric powder

2 tsp Corriander powder

1 tsp Cumin powder

1 tsp Cayenne ( Hot chilli powder)

2 tsp Paprika ( Mild chilli powder)

½ tsp Garam masala

2 tsp Dried Fenugreek leaves, crushed

Salt to taste


Heat oil in a pan. Add the whole cloves, cardamom and cinnamon stick. Add the ginger garlic paste and onion paste. Fry on medium heat for 5-6 minutes. Now add the turmeric, coriander and cumin powders, garam masala, cayenne and paprika. Also stir in the prepared tomato puree. Saute on low heat for 10 minutes. This thickens the gravy and helps the flavours blend well.


Season with salt and add the dried fenugreek leaves. Stir in the cashew paste and cream. Combine well and bring to a boil. Adjust seasonings if required and turn off heat.


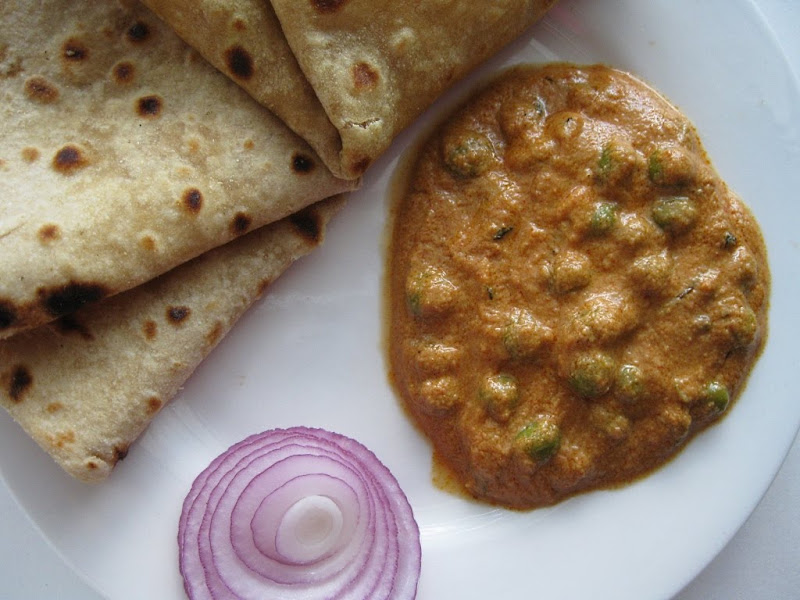
This curry goes great with Butter Naans or plain rotis/chapathis.

Blog Widget by LinkWithin