Chocolate Mallows for the Daring Bakers


The July Daring Bakers' challenge was hosted by Nicole at Sweet Tooth. She chose Chocolate Covered Marshmallow Cookies and Milan Cookies from pastry chef Gale Gand of the Food Network.


I got down to this month's challenge in the nick of time! Its been a very busy month with travel and taking care of customers. We had the choice of making both the cookies or either one. I chose to make only the Chocolate covered Marshmallow Cookies considering I got a chance to tackle e challenge this late in the month.


I've always wanted to make Marshmallows at home but always got cold feet thinking about the process. I finally did it with this challenge and it really wasn't as hard as I thought it would be...it was a little time consuming though.

Mallows(Chocolate Covered Marshmallow Cookies)
Recipe courtesy Gale Gand, from Food Network website

Prep Time: 10 min
Inactive Prep Time: 5 min
Cook Time: 10 min
Serves: about 2 dozen cookies

• 3 cups (375grams/13.23oz) all purpose flour
• 1/2 cup (112.5grams/3.97oz) white sugar
• 1/2 teaspoon salt
• 3/4 teaspoon baking powder
• 3/8 teaspoon baking soda
• 1/2 teaspoon ground cinnamon
• 12 tablespoons (170grams/ 6 oz) unsalted butter
• 3 eggs, whisked together
• Homemade marshmallows, recipe follows
• Chocolate glaze, recipe follows

1. In a mixer with the paddle attachment, blend the dry ingredients.
2. On low speed, add the butter and mix until sandy.
3. Add the eggs and mix until combine.
4. Form the dough into a disk, wrap with clingfilm or parchment and refrigerate at least 1 hour and up to 3 days.
5. When ready to bake, grease a cookie sheet or line it with parchment paper or a silicon mat.
6. Preheat the oven to 375 degrees F.
7. Roll out the dough to 1/8-inch thickness, on a lightly floured surface. Use a 1 to 1 1/2 inches cookie cutter to cut out small rounds of dough. (I used a 1 inch cookie cutter)
8. Transfer to the prepared pan and bake for 10 minutes or until light golden brown. Let cool to room temperature.
9. Pipe a “kiss” of marshmallow onto each cookie. Let set at room temperature for 2 hours.


10. Line a cookie sheet with parchment or silicon mat.
11. One at a time, gently drop the marshmallow-topped cookies into the hot chocolate glaze.
12. Lift out with a fork and let excess chocolate drip back into the bowl.
13. Place on the prepared pan and let set at room temperature until the coating is firm, about 1 to 2 hours.


Note: if you don’t want to make your own marshmallows, you can cut a large marshmallow in half and place on the cookie base. Heat in a preheated 350-degree oven to slump the marshmallow slightly, it will expand and brown a little. Let cool, then proceed with the chocolate dipping.

Homemade marshmallows:

You will need:
• 1/4 cup water
• 1/4 cup light corn syrup
• 3/4 cup (168.76 grams/5.95oz) sugar
• 1 tablespoon powdered gelatin
• 2 tablespoons cold water
• 2 egg whites , room temperature
• 1/4 teaspoon pure vanilla extract

1. In a saucepan, combine the water, corn syrup, and sugar, bring to a boil until “soft-ball” stage, or 235 degrees on a candy thermometer.
2. Sprinkle the gelatin over the cold water and let dissolve.
3. Remove the syrup from the heat, add the gelatin, and mix.
4. Whip the whites until soft peaks form and pour the syrup into the whites.
5. Add the vanilla and continue whipping until stiff.
6. Transfer to a pastry bag.

The marshmallow 'batter' was white and glossy and the piping was a lot of fun. After topping all the cookies, I still had some leftover so I spread it out into an 8x8 glass dish and let set overnight. We had the most wonderful tasting home-made marshmallows the next day.

Chocolate glaze:

You will need:
12 ounces semisweet chocolate
2 ounces cocoa butter or vegetable oil

Melt the 2 ingredients together in the top of a double boiler or a bowl set over barely simmering water.Use as required.


I halved the cookie dough recipe, and it yielded about 5 dozen mini cookies(one inch wide). They were perfectly bite sized. I loved the taste; the cookie, marshmallow and chocolate make for a yummy combination. I will surely be making these again.

Thanks Nicole for a wonderful challenge! Check out what the rest of the Daring Bakers did this month world over.

Another scrumptious challenge completed... :)

Spaghetti with a kick

I have friends who just can’t bear to eat Pasta – reason: it’s bland! Hubby is not big on pasta either unless it’s seasoned and flavoured well. I tried this last week and he was pleased.This is for all my friends out there who hate pasta, try this and I’m sure you will be having second thoughts about Pasta.


You will need:


1/2 lb Spaghetti

1 tbsp Olive oil

½ cup Onion, chopped

½ cup canned Black beans, drained and rinsed

½ cup canned Red Kidney Beans, drained and rinsed

½ cup Yellow corn, drained

1 Cup Marinara sauce (I used Roasted Garlic & Herb)

1 tsp Cumin powder

½ tsp Hot sauce (adj. to taste)

¼ cup Water

Salt to taste

1 tbsp chopped fresh Cilantro (Corriander)

2 tbsp Grated parmesan


Bring a large pot of water to boil.Salt generously and add the pasta. Cook for 13 minutes (less if you like a bite to it).


While the pasta is cooking; heat a pan with olive oil. Add the chopped onions and sauté till translucent. Stir in the marinara, cumin powder, black and red beans, corn and hot sauce. Stir and bring to a simmering boil on medium heat. Stir in ¼ cup Water to make a sauce consistency. Simmer 2 minutes and turn off.


Once the pasta is done, drain and toss with the sauce. Season with salt as required. Just before serving, sprinkle the grated parmesan and chopped cilantro on the spaghetti.


I was pleasantly surprised how well the flavours came together and made the pasta almost ‘Indianized’ if I may say so. The corn cuts the heat from the cumin and hot sauce. Its definitely a party in your mouth!


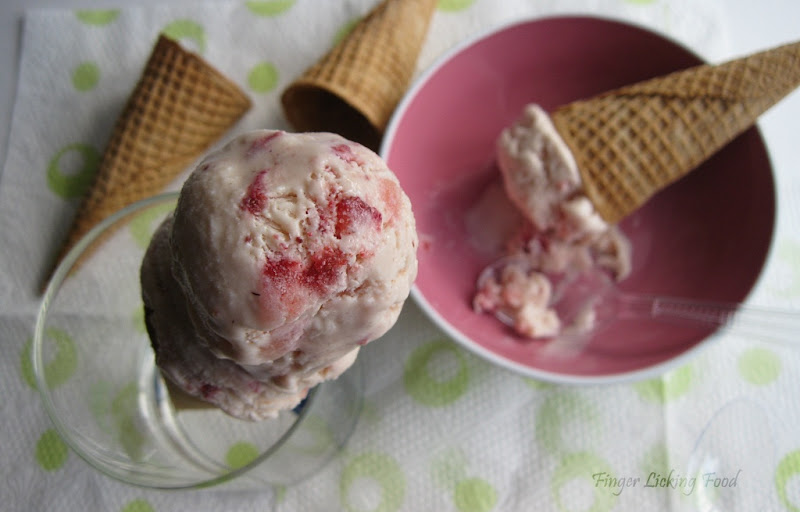
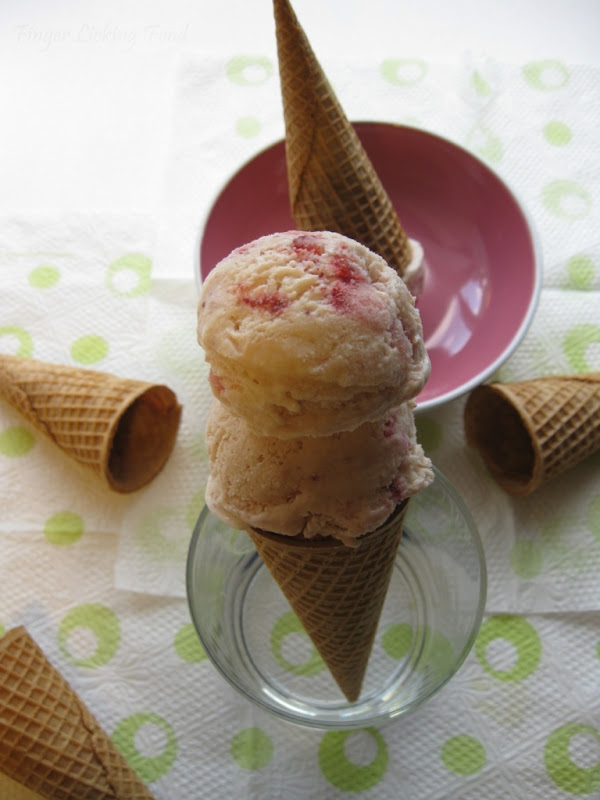
Strawberry Ice-cream

Strawberries....mmmm, can't get enough of them! This summer has been great with a bounty of great tasting strawberries straight from the farm to my kitchen. I gorged on a lot of the berries, made strawberry jam with another lot and still had so much left over. I had to freeze them to keep them from going bad, it will come in handy when strawberries go out of season.

This is another ice-cream you can hand crank at home without a machine.

The mushy ones which I couldn't freeze went into making this strawberry ice-cream. After making Mango ice-cream at home I simply had to try strawberry ice-cream with fresh strawberries.

Strawberry Ice-cream

You will need: Makes about 3 quarts


1 ½ cup Milk

1 ½ tbsp Sugar

1 tbsp Strawberry Custard powder (substitute: Vanilla custard powder)

1 cup sweetened condensed milk

1 cup Fresh strawberry puree (fresh strawberries, washed and pureed)

1 cup Heavy whipping cream

1 tsp Strawberry extract

½ cup chopped frozen strawberries (don’t thaw)

Hand held electric beaters

Mix ½ cup of milk with 1 tbsp custard powder. Bring remaining milk and sugar to a rolling boil on medium heat. Turn down heat and then stir in the custard mix. Stir continuously for 4 minutes till the custard thickens and coats the back of your spoon. Remove from heat and let cool completely.

Meanwhile blend the sweetened condensed milk, strawberry puree, whipping cream and strawberry extract in a medium bowl (which will fit into your freezer)

The procedure to make the ice-cream is similar to the Mango ice-cream (click to see instructions) When you whip the mixture the final time, stir in the chopped frozen strawberry bits. Transfer mix to a plastic container and freeze for 6-8 hours or overnight.


The strawberry extract and the strawberry puree added a ton of flavour and I was really happy when the ice-cream smelled like strawberries :D The taste of course was undoubtedly strawberry-ey.

Sringeri Halwa

Note: I'm having some issues uploading pics and editing my blog, please bear with me while I try to figure it out. Ignore the extra large fonts on the blog title and side bar.
Now onto the halwa.For as long as I can remember, Sringeri halwa was made at home when there was an unexpected guest. It still is. All it needs is a couple of hours to set and its ready to eat; it’s as easy as making Jell-O. We’ve always known it as Sringeri Halwa. Sringeri is a small city in the state of Karnataka known for the historic temples.When I made this halwa a couple of weeks ago, I googled to see what I could find more on the ‘Sringeri Halwa’ and to my surprise I found out that no such halwa is made in Sringeri… :-D!! I had to ask mom what the story behind the halwa was….and more surprisingly, there was none. She didn’t know how the name came about either, but she did mention maybe someone from Sringeri was visitng and they made the halwa or something like that (So much for making this when there is a guest!) I told her I was going to put this on my blog and I didn’t want someone from Sringeri telling me “Hey, we don’t make this halwa”. So mom and I went back and forth trying to rechristen this halwa – sadly no luck there, even after suggestions like 8 ingredient halwa, cornflour halwa (yes it is!). I finally stuck to Sringeri Halwa, sounds better…made in Sringeri or not!


Cornstarch is probably the last ingredient you would expect an entire halwa to be made up of, trust me this one is sure to surprise you. The key is the proportions and it’s a breeze to make.

You will need:

1 cup Cornstarch (Corn flour)
1 ½ cups Sugar
2 cups Milk
2 cups Water
1 tsp Cardamom powder
2 tsp ghee plus more for greasing plates
1 tsp Cashew bits
1 tsp Raisins

Grease two 8 inch wide, shallow plates with ghee. Heat 2tsp ghee in a small pan, add the cashew bits and raisins, fry till cashews are light brown and raisins are bloated. Set aside.

In a heavy deep saucepan combine cornstarch, milk, water and sugar. Stir to combine and then place pan on medium heat. Stir constantly for 4-5 minutes till the mixture thickens to form a paste. When you push the mixture with your spatula, it should stand on one end, for a few seconds atleast. This is the consistency required for it to set up. Add more sugar if required. Stir in the cardamom powder. Remove from heat. Divide mixture between the two plates, and smooth out evenly. Let cool for 15 minutes and then refrigerate for 2 hours.

Cut into slices using a sharp knife. Top with cashews and raisins.

The texture is smooth and on the first bite it’s hard to taste at all, with the second bite you know its sweet and the cardamom hits in.

Egg Salad Sandwich

If you've been wondering why there have been no updates here for a while now, its because we were on a week's vacation to Alaska...the best place I've been to yet! It was one amazing vacation with a lot to see. The weather was perfect throughout the trip and Mother Nature was at her shiny best. We got back on Saturday and its taking me forever to get over the 4 hour jet lag. I just about finished unpacking yesterday and had to get cooking right away for waiting customers.

I made this a couple of weeks ago before we went on the vacation. Every evening hubby and I need something to munch on to satisfy 'that too early to eat dinner' hunger. The first time I had an Egg Salad sandwich was at a friend's, who is into very simple cooking.


There is really not much to an Egg Salad Sandwich, really! It comes together in a jiffy making it perfect for lunch in a hurry or a snack.


You will need:


4 hard-boiled eggs, shelled

2tbsp low-fat Mayonnaise

2 tbsp finely chopped celery

Salt and pepper

A few pinches Paprika

4 slices of bread (white/wheat), toasted


Place eggs in a small bowl. With the help of a fork, mash the eggs into tiny bits. Stir in the mayo, celery, salt and pepper. Mix well, check for seasoning.


Spread the egg salad on toast, sprinkle with paprika and top with another toast.


It’s as simple as that! This is a great way to use up leftover boiled eggs. You can top the egg salad with tomato slices and/or lettuce too.


Thanks to all of you who stopped by my Daring Bakers post, I still haven't had a chance to read your comments.. will get down to it soon.


Blog Widget by LinkWithin