Showing posts with label What's on Your Plate. Show all posts

WOYP Day # 59 Pani Puri Puris and Floating Pani Puri


For as long as I can remember, my mom has always made these perfectly shaped crisp puris at home which went into making a variety of Chaats. The puris are very tasty and definitely different from store bought puris. 


 Home made Chaat is scrumptious as is and these puris add to the yumminess! It may seem like a lot of work but I made one batch of these puris in under and hour and it took my family even lesser time to finish all the puris at once!! :D I made Masala Puri and Floating Pani Puri


These Puris can be made well ahead of time, so there is no rush on the day you plan to actually make the chaat. This recipe makes about 80-100 puris, you can make all of it and store so you have puris on hand when the chaat craving hits out of the blue (happens to me all the time! :D) or you can halve the recipe.

Pani Puri Puris
You will need:


1.5 cups Fine Sooji/Chiroti Rave (Fine Semolina)
1/2 tsp Salt
2 tbsp Oil
Oil for deep frying

Rolling pin, 1.75” cookie cutter

Combine the fine sooji and salt in a medium bowl. Add oil and combine. The dough should hold shape when pressed into a fistful. Slowly add enough water to  make a soft smooth dough. The dough shouldn’t be too stiff or sticky. Cover and rest for 30 minutes to an hour.  


Set the oil to heat in a deep pan on medium high heat. Knead the dough for a few minutes after it has rested. Divide the dough into 3 portions. Roll out one portion thinly using a rolling pin.Keep remaining dough covered.  Use a cookie cutter to cut circles. Cut them as close to each other as possible. Remove circles, and gather the scraps. Gather the scraps and roll into a ball before re-rolling. Fry one batch of puris first before cutting out more. 


Test the oil temperature by dropping a pinch of dough into the oil. If it rises quickly to the top then the oil is ready. Slide in the cut circles, the puris will puff up almost immediately. Fry for 15-20 seconds on one side and flip to brown on the other side. Once the puris are crisp, remove to a paper towel lined plate. Lower the heat to medium low while you roll and cut out more puris. Repeat until all the puris are cut and fried. 


Cool puris completely before storing in an air tight container. All the puris puffed up but you may get some flat ones. Those work perfectly to make Masala Puri or Papdi Chaat


Floating Pani Puri:

Traditionally, filled puris are served with a tangy spicy pani to make Pani Puri. On my last visit to Bangalore, I got a taste of these floating pani puris and loved the idea. I have no clue about the origin of the name or why these were served this way, all I know is it tasted just as delicious! :D


You will need:

Pani Puris, as many as needed
1/2 cup Dried Peas (Vatana)
1/4 cup Onion, chopped
1/4 cup Grated carrot
1 tbsp Chopped cilantro
1 Cup prepared Pani (recipe below)
Meeta (Sweet Tamarind chutney), optional

Pani for Pani Puri: 

Grind to a smooth paste - 1/2 cup fresh Mint leaves, 1/2 cup fresh Cilantro, 4 green chilies. Add this paste to 2 cups cold water with 1 tablespoon Pani Puri Masala (store bought), salt to taste and a pinch of Chaat masala. Combine well.  Adjust to taste and serve as needed.

Soak dried peas in sufficient water for 4-6 hours. Boil the peas in a pressure cooker for 2 whistles until soft. Drain the water.

To assemble: Gently crack the top of each puri. Combine the onions, grated carrot and cilantro in a bowl. Fill each puri with the boiled vatana and the onion carrot mixture. Place filled puris in a shallow bowl. Pour 1/4 cup pani over the puris. Add little more if needed. Serve immediately. These are best assembled when ready to eat since the pani will make the puris soft. You can add little meeta to the puris too if needed. I do enjoy a bit of sweet in every bite so I do add meeta in mine. 


WOYP Day #58 Eggless Sweet Buns (Tutti frutti Buns)


Sweet buns or Tutti Frutti buns are popular in bakeries in Karnataka. I loved these as a kid and still do enjoy them. The heady aroma hits you anytime you drive past one of these bakeries and who can resist freshly baked buns? Yum! Few weeks ago I made Khara buns (spicy buns flavored with fresh Dill) and Sweet buns were next on my list. On our last visit to Mysore, my boys tried them for the first time and were hooked. They were thrilled that I made these at home :)


Pillowy soft buns studded with sweet Tutti Frutti, it truly is heaven in every bite!! :) These are easy to make, you can use a stand mixer or mix by hand if you don’t have one. Good old kneading by hand gives you a nice arm workout! :D This recipe also doesn’t require proofing the yeast but it does need an hour and ten minutes of proofing, so make sure you plan ahead for that.

Eggless Sweet Buns:
You will need:
Makes : 6 Sweet Buns

1 1/2 cups All-purpose flour
5oz Warm water
1 tsp Instant Yeast
1/4 tsp Salt
3 Tbsp Sugar
3 Tbsp Tutti Frutti plus 1 tablespoon
2 Tbsp Olive Oil (or Vegetable oil)

1 tablespoon Unsalted Butter, softened

Combine all purpose flour with yeast, salt, sugar and tutti frutti in a medium bowl. Add warm water little at a time to form a soft, sticky dough. Add the oil and knead by hand for 6-8 minutes until a cohesive soft dough is formed. Kneading helps develop gluten which makes soft buns. 


 Place in a lightly oiled bowl and allow to double in size, about an hour.

Lightly punch the dough and turn out onto a countertop. Knead gently for 5 minutes. Divide the dough into 6 parts. Shape into buns and place on a baking sheet or a lightly greased 9” baking pan. Cover and rest for 10 minutes. 


Preheat oven to 400F. After the buns have rested, lightly brush the top of the buns with milk and sprinkle tutti frutti on top. Bake for 15-18 minutes until the top is a light brown. 


Once the buns are out of the oven. Brush the tops with melted butter. Cool well on a cooling rack before storing. 


WOYP Day # 57 Grilled Corn and Feta Salad


Summer time brings a bounty of fresh corn, Watermelon, Mangoes and scrumptious strawberries. Grilled corn on the cob is a family favorite. Back home in India fresh corn brings back memories of cold days - which meant corn on the cob roasted over a bed of coals and while its piping smeared with a generous dab of green chili paste, salt and lemon juice. There are so many ways to dress up grilled corn, the possibilities are endless!! :D The boys like it with butter and little salt, sometimes with garlic salt. We like it with chili powder (cayenne), salt and lemon juice or with green chili paste and salt and little bit of ghee to cut the heat!! Yumm!


To shake things up a bit, I made a salad with the grilled corn kernels, crunchy red bell peppers, onions and some jalapenos for heat. Tossed in a quick and easy mayo dressing, this salad could well be the star at your next summer party!

Grilled Corn and Feta Salad:


You will need:

3 ears of Yellow corn
1/2 cup Red bell pepper, chopped
1 Jalapeno , chopped
1/4 cup Red onion, chopped
2 tbsp fresh Cilantro, finely chopped
3 tbsp Mayonnaise
2 tsp Sriracha (or any hot sauce)
1/2 tsp Salt
1/4 tsp Black pepper powder
1 tbsp Crumbled Feta cheese

Grill the corn on the cob over an open flame or on an outdoor grill if you have one. Both methods give it a nice char which is akin to grilled or roasted corn. The easiest way to get the kernels off the cob is to use a sharp knife. I use a large bowl, place a smaller bowl inverted in the larger bowl. Place the cob on top of the smaller bowl and use the knife. Hold the cob firmly with one hand and with the knife in the other start from the top and come down in one swift move. Turn the cob and repeat. That’s it! The kernels are collected in the larger bowl without a mess :)


Remove the inverted smaller bowl, and to the same large bowl add the chopped onions, red bell pepper, jalapeños and cilantro.


In another bowl whisk together the mayonnaise, salt, pepper and hot sauce.


Add this to the corn and chopped veggies. Combine well. Top with crumbled Feta and serve.


We recently had some dead trees felled in our back yard and I had them cut a few stumps for me. I'm still figuring out what I'll use them for, meanwhile couldn't resist taking a few pictures! :D


Grab a chip and this salad makes an awesome dip!

WOYP Day # 56 Mango Rasgullas


Rasgulla or Roshogolla (Bengali) or Rosogola (Oriyan) was first made in Orissa (now Odisha). Bengal, Orissa’s neighboring state also has a version of the Rasgulla, slightly different in taste, color and texture. Ras means juice and golla is ball. Typically Rasgullas are white and not flavored. They are pillowy soft and spongy melt-in-the-mouth balls of paneer (before it is set) in a light sweet syrup. 

 
I’ve made my fair share of Rasmalais over the years (I've lost count, hundreds for sure!!:D ) which requires making Rasgullas first and then boiled in flavored milk. So making Rasgollas isn’t new to me at all, but I wanted to try a flavor twist to it. I had canned Mango puree on hand and thus Mango Rasgullas were born! You can use fresh mango pulp but I think with all the cooking the flavor will be mellowed and lost so for these Rasgullas I do highly recommend canned Mango pulp. Its stronger in flavor, color and taste. The recipe below can easily be doubled. 


Mango Rasgullas
Makes: 10 small Rasgullas


You will need:

2.5 cups Whole milk
2 tbsp Vinegar or Lemon juice
1/3 cup Mango pulp (fresh or canned)
1 tsp Semolina (Rava)

For the syrup:
2 cups water
1 cup Sugar
3 pods Green Cardamom
Few drops Mango extract 

Finely chopped unsalted Pistachios (optional) 

Heat milk in a medium pan. Stir to prevent burning. Bring to a boil and then add the vinegar or lemon juice. Stir to split the milk. Turn off heat and allow to sit for a minute.

Line a colander with a cheesecloth or thin cloth. Strain the split milk and rinse the Paneer under running cold water. This removes the vinegar/lemon juice residue. Don’t skip this step or else you will end up with very sour tasting Rasgullas!!

Squeeze out as much water as you possibly can from the Paneer. It doesn’t need to fully dry but not soggy either. 

 
Remove from the cloth into a shallow plate. Knead gently for 2-3 minutes until the mixture comes together. Add 2 tablespoons of the mango purée and the semolina. Knead to combine. 
 
Divide into 10 equal balls. Prepare the syrup. Combine water, sugar and cardamom in a pressure cooker. Bring to a rolling boil. Add 2 tablespoons of mango pulp and few drops of the mango extract. When the water begins to boil add the Paneer balls. Close the lid and turn the heat to high. Place weight on the cooker and allow it to whistle once. Then turn down the heat to low and cook for 8 minutes.

The first blast of pressure allows the balls to double in size, and the cooking time allows it to cook slowly and soften in the process. 

 
Turn off heat and cool before opening the lid. Remove the rosgullas to a bowl carefully since they are fragile. Add remaining mango purée to the syrup and boil for 5-6 minutes until thickened. Return the rasgullas to the syrup. Cool completely before serving. Top with chopped Pistachios if using.

 
Spongy Mango Rasgullas are easy to make and taste absolutely delicious!  I think I might have to make another batch very soon :D These lasted only until I took pics haha!

WOYP Day # 55 Buterscotch Ice-cream (Without an Ice-cream Maker)


Butterscotch Ice-cream…brings back memories of the scoops of ice-cream we used to eat as kids -  a pale yellow ice-cream with a distinct flavor and loaded with crunchy butterscotch bits. Butterscotch here in the US is very different and the flavor doesn’t come close enough to the one back home. I set out to make my very own version of this ice-cream. It wasn’t easy adapting this flavor to another base recipe so I came up with my own, which worked beautifully! It combines a custard base with a whipped cream base which yields a smoother ice-cream which is akin to the ones made with an ice-cream maker. 


Butterscotch extract smells heavenly but it can easily get over powered by other ingredients. The idea is to add layer upon layer of the same flavor so it shines through in every bite. Making the butterscotch brittle is easy as long as you keep an eye on it and the heat is on medium to medium low.

You can churn the mix in a ice-cream maker if you have one, but this doesn’t need to be churned and can be made without an ice-cream maker. You will need a hand held beater to whip the cream.

Butterscotch Ice-cream (Without Ice-cream maker) 


You will need:

1 cup Heavy whipping cream
1/2 cup powdered sugar
1 tbsp Butterscotch Extract
A generous pinch -  Yellow Food Color powder

1/2 cup Milk
1/4 cup Sweetened Condensed milk
1 tbsp Corn starch + 2 tbsp Cold milk (combine)
2 tbsp Milk powder

For the Butterscotch brittle:

3 tbsp sugar
1 tbsp Cashewnuts, chopped
1 tsp Butterscotch extract
1 tbsp unsalted Butter
Parchment lined baking sheet or plate

Prepare the Brittle:

Heat the sugar in a non stick pan on medium heat and stir. The sugar will begin to melt, continue stirring until all the sugar is melted. Continue to heat until the color changes from light yellow to a golden yellow and then light brown. This happens fairly quickly so keep an eye. Stir in the butter and chopped nuts. Combine and remove from heat. Pour mixture onto parchment and spread it thin quickly. Allow to cool completely. The brittle will harden and peel off from the parchment easily. Using a sharp knife chop into tiny bits. 


Store in an air-tight container in a cool place. If you have a hot humid kitchen, this is best stored in the refrigerator. The brittle can be made ahead of time. 


Prepare the base:

Part 1 - Custard base

Combine the corn starch and cold milk to make a smooth paste. Set aside. Heat the milk in a saucepan. When it is warm, remove a tablespoon and combine with the milk powder until it’s smooth with no lumps. Add this to the milk and stir. Stir in the sweetened condensed milk and bring to a boil. Lower heat and stir in the corn starch paste. Continue to stir until the mixture thickens. Remove from heat and cool.

Part 2 - Whipped cream base

Chill a mixing bowl and beaters in the refrigerator for 30 mins to an hour. Once chilled, add the whipping cream, powdered sugar and Butterscotch extract to the bowl.Also add the pinch of color.  Beat on low speed for a minute and then increase speed. Whip to form soft peaks.

Slowly add in the cooled custard base to the whipped cream base and fold. Stir in about 1/2 of the prepared butterscotch bits.


Combine well and transfer to a glass container or any air tight container. Freeze for 4-6 hours or more. 


 Scoop into a bowl and top with more butterscotch bits. 


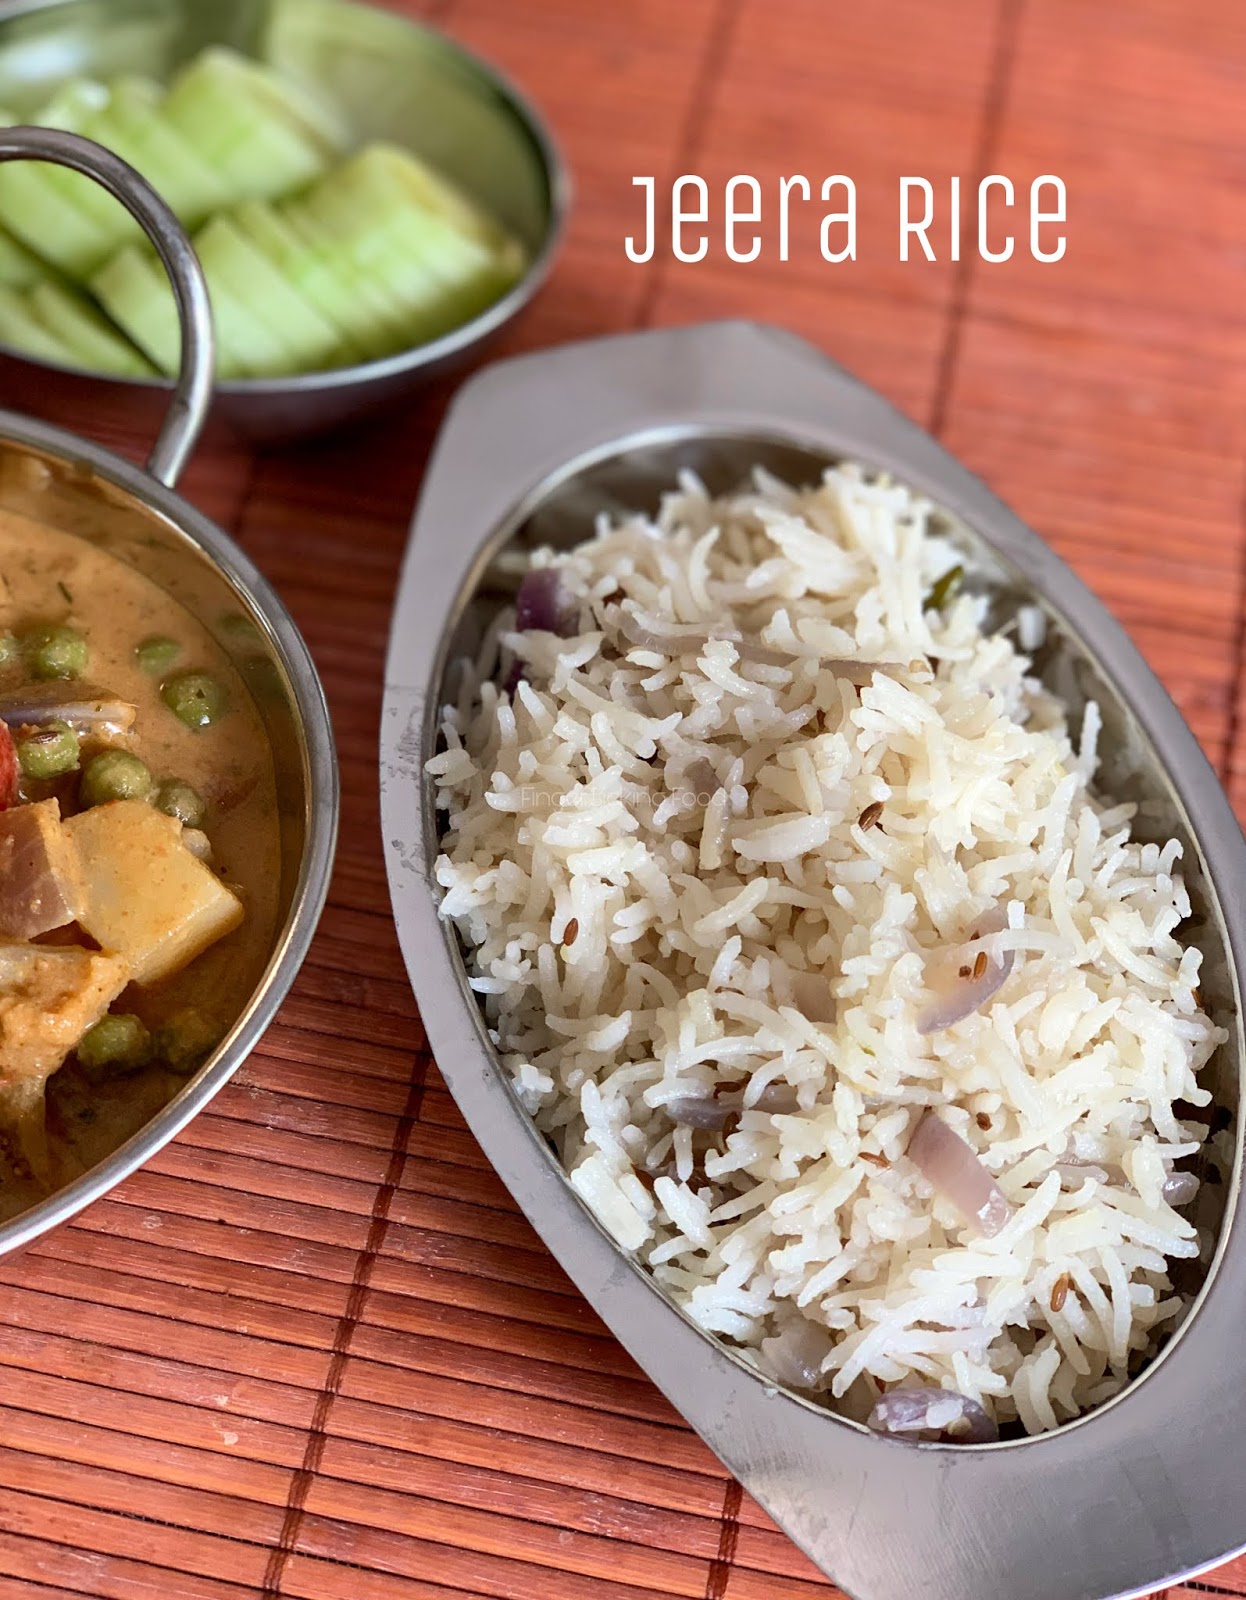
WOYP Day # 54 Shahi Aloo Gobi with Jeera Rice


I was at a Farmers Market last week and stocked  up on a bunch of fresh fruits and vegetables. This place is almost an hour's drive so I don't get to go there often. I had work in the area and made a quick detour :) What was supposed to be a quick stop turned into a 2-hour shopping spree :D I bought a bunch of colored bell peppers too, more of the red since I love how they make any dish vibrant. The beets went into making these gorgeous cutlets. We've been gorging on various fruit too ever since - Fresh figs, Plums, Raspberries, Strawberries, Grapes, luscious giant Mangoes that are super sweet, Pineapple, Watermelon (which I'm yet to cut) and all the fresh veggies. 


Made a quick and easy indulgent curry using Cauliflower, Potatoes, Peas and Red bell pepper. I say indulgent, since it is calorie rich but also laden with veggies, so i think it's alright to indulge every now and then :D 


Shahi Aloo Gobi
You will need:

1 cup Cauliflower, cut into florets
1/2 cup Potato, cubed
1/2 cup Red bell pepper, cubed
1/2 cup Green peas, fresh or frozen
1/2 cup Onion, cubed
2 tbsp Butter
1/2 tsp Cumin seeds
2 tsp Ginger Garlic paste
1/4 tsp Turmeric
1 cup Tomato Puree
1 tbsp Coriander powder
2 tsp Cumin powder
1 tsp Kashmiri Red chili powder
1 tsp Kasuthi methi
3 tbsp Cashewnut paste
2 tbsp Heavy whipping cream
Salt to taste

Boil the potatoes, cauliflower and peas until cooked but not mushy. Drain and set aside.

Heat butter in a pan. Add the cumin seeds. Add the onions and sauté until soft. Add the ginger garlic paste and turmeric. Cook until fragrant. Add Now add the tomato purée, turmeric, coriander powder, cumin powder, Kashmiri red chili powder and salt to taste. Combine and cook for 5-6 minutes. Add 1/2 cup water, the boiled veggies, red bell pepper and kasuthi methi. Combine, cover and simmer for another 4 minutes. Stir in the cashew paste and the cream. Cook for a minute and turn off heat. This will thicken the gravy and make it creamy and delicious! 


Shahi Aloo Gobi goes well with Jeera Rice or Chapatis/Rotis.

Jeera Rice:

Traditionally Jeera rice is long grained rice cooked with cumin seeds and little salt. I make it with onions, green chilies and ginger garlic paste to elevate the flavors. 


You will need:

1 cup Basmati rice
1.5 cups Water
2 tbsp oil
1 tsp Cumin seeds
3 Green Chillies, slit
1/2 Onion thinly sliced
2 tsp Ginger Garlic Paste

Wash the basmati rice until the water runs clear. Soak in water for 30 minutes.

Heat oil in a pressure cooker. Add the cumin seeds. Saute for few seconds and then add the green chillies and ginger garlic paste. Add the sliced onions and cook until soft. Drain the soaked rice and add it with the measured quantity of water. Season with salt to taste. Stir and raise the heat to high. Close the cooker lid and allow the steam to rise. Place weight on the cooker lid and lower heat to low. Cook for 10 minutes and turn off heat. Rest for 5-6 minutes before opening the lid. Stir rice gently to combine and then serve. This method of cooking ensures perfectly cooked fluffy rice.

WOYP Day # 53 Spinach Corn Soup


We have had rainy, stormy days every now and then. Gloomy and cloud laden skies today, and plenty of rain. Though it is still warm outside, it felt like a Soup kind of day :) Spinach and Corn make a great combination in soup. This soup is light and is perfect with a sandwich to make a meal. 


Spinach Corn Soup: 

You will need: 

2 cups chopped Spinach
1/2 cup Yellow corn kernels (from a can, drained)
2 pods Garlic, finely chopped
2-2 1/2 cups water
1 tbsp Corn starch
Salt to taste
1/2 tsp Black pepper powder
2 tsp light Soy sauce

Salt to taste
1 tsp Sugar
2 tsp Oil


Heat oil in a saucepan. Add the chopped garlic and sauté until fragrant but not browned. Add the chopped spinach and corn. Cook for a minute until the spinach wilts but is still green, and then add water. Stir and then add the salt, pepper, soy sauce and sugar. Combine well and bring to a boil.Add little salt at a time, since the soy sauce is also salty.  Prepare a slurry of the corn starch using little water. Add to the boiling soup and stir. This will thicken the soup. Simmer and then turn off heat. Serve hot. 

That's it! A simple and heart warming soup for any season.

WOYP Day # 52 Paneer Tikka (in oven)


Paneer Tikka is a popular appetizer in Indian restaurants, often made in a large Tandoor, which is traditionally a clay oven.  A Tandoor has very high temperatures going up to almost 900 F. The intense heat, comes from a coal fire which is at the bottom. This heats the wall and insides of the oven, allowing food to cook evenly and faster too. An array of foods are cooked in the Tandoor - indian breads like Naan, Roti, a variety of tikkas including Paneer and veggies and a large variety of meats. The clay oven and coal impart a signature smoky flavor to foods cooked in the Tandoor. 

Paneer Tikka cooked in the Tandoor is done using long metal skewers. Cooking in a Tandoor is an art in itself and often there is an assigned chef or cook who is solely responsible for handling Tandoor dishes in restaurants. 

To recreate the same dish at home, neither do we have ovens that go up to 900 F nor is it feasible to have a coal fire all the time (unless you have an outdoor coal grill). So the closest in taste is baking the Paneer and veggies first and then broiling them to give them a char. 


Paneer Tikka:
You will need:

200 gms Paneer, cut into large cubes
Oil 2-3 tbsp
1/2 cup cubed Green bell pepper
1/2 cup cubed Red bell pepper
1/2 cup cubed Yellow bell pepper
1/2 cup cubed Onion

1 tsp Chaat masala
Mint chutney
Thinly sliced onions to serve

Marinade:

1/2 cup Plain yoghurt
1 tbsp Coriander powder
2 tsp Cumin powder
1 tsp Red chili powder
1/2 tsp Chaat masala
1/4 tsp Turmeric
3/4 tsp Salt
1/2 tsp Kasuthi Methi (crushed)

Wooden or Metal Skewers
Foil lined baking sheet

In a medium bowl whisk together the marinade ingredients. Add the cubed paneer, bell pepper and onion. Combine well to coat evenly. Set aside for 2-3 hours or for at least an hour.

Preheat oven to 425 F.

Lightly oil a foil lined baking sheet. Skewer the paneer, bell pepper and onions alternately on the wooden or metal skewer. Place on the oiled baking sheet. Brush more oil on the paneer and veggies. 


Bake for 6 minutes and then place under broiler for 2-3 minutes. This will char the veggies and Paneer. 


Remove from the oven and rest for 3-4 minutes before lifting the skewers off the pan. If you try to remove them right out of the oven the Paneer will rip off the skewer. 


Gently slide veggies and Paneer off the skewers. Sprinkle chaat masala on top and serve with Mint chutney and thinly sliced onions. 


 Savor the soft & spicy Paneer with the crunchy broiled veggies. Yum! :)

WOYP Day # 51 Instant Spinach Rava Idlis


Rava Idli is a popular breakfast dish in Karnataka. Rava idlis can be made instantly, which means there is no need to soak, grind or ferment to make the batter. It’s very easy to make the Rava idli mix at home with Semolina or Rava and it tastes a lot better than the instant mixes available on the market. Spinach Rava idlis are a variation to these Idlis. 

  
You will need:

2 cups Semolina (Upma Sooji)
3 tbsp Oil
1/2 tsp Mustard seeds
1 tsp Chana dal
Few curry leaves, chopped
2 tsp Salt

For the Idli batter:
Prepared Rava idli mix
4 cups Plain yoghurt thinned with 1 cup water to make 5 cups in total
2 tsp Fruit salt  
1 cup finely chopped fresh Spinach

 
Heat oil in a pan. Add the mustard seeds and when it begins to splutter add the chana dal and curry leaves. Sauté for a few seconds and then add the measured quantity of Rava. Combine and roast for 3-4 minutes until fragrant. Turn off heat and allow to cool.

Once cooled add the chopped spinach to the prepared rava idli mix and combine. 


Add 2 cups of yoghurt. Mix well and set aside for 2 minutes. Now add the remaining yoghurt and mix well. The batter should be in pourable consistency. Lastly add the fruit salt and mix vigorously to lighten the batter. This yields soft and fluffy idlis. If the batter feels thick and dense, add 1/4 tsp more of the fruit salt and combine until batter feels light. 


Grease idli plates with little oil. Add 1/4 cup batter to each mold.Steam in a pressure cooker or idli cooker for 10 minutes. Cool for a few minutes before de-molding. Repeat with the remaining batter.

Serve hot with Bombay Gojju.

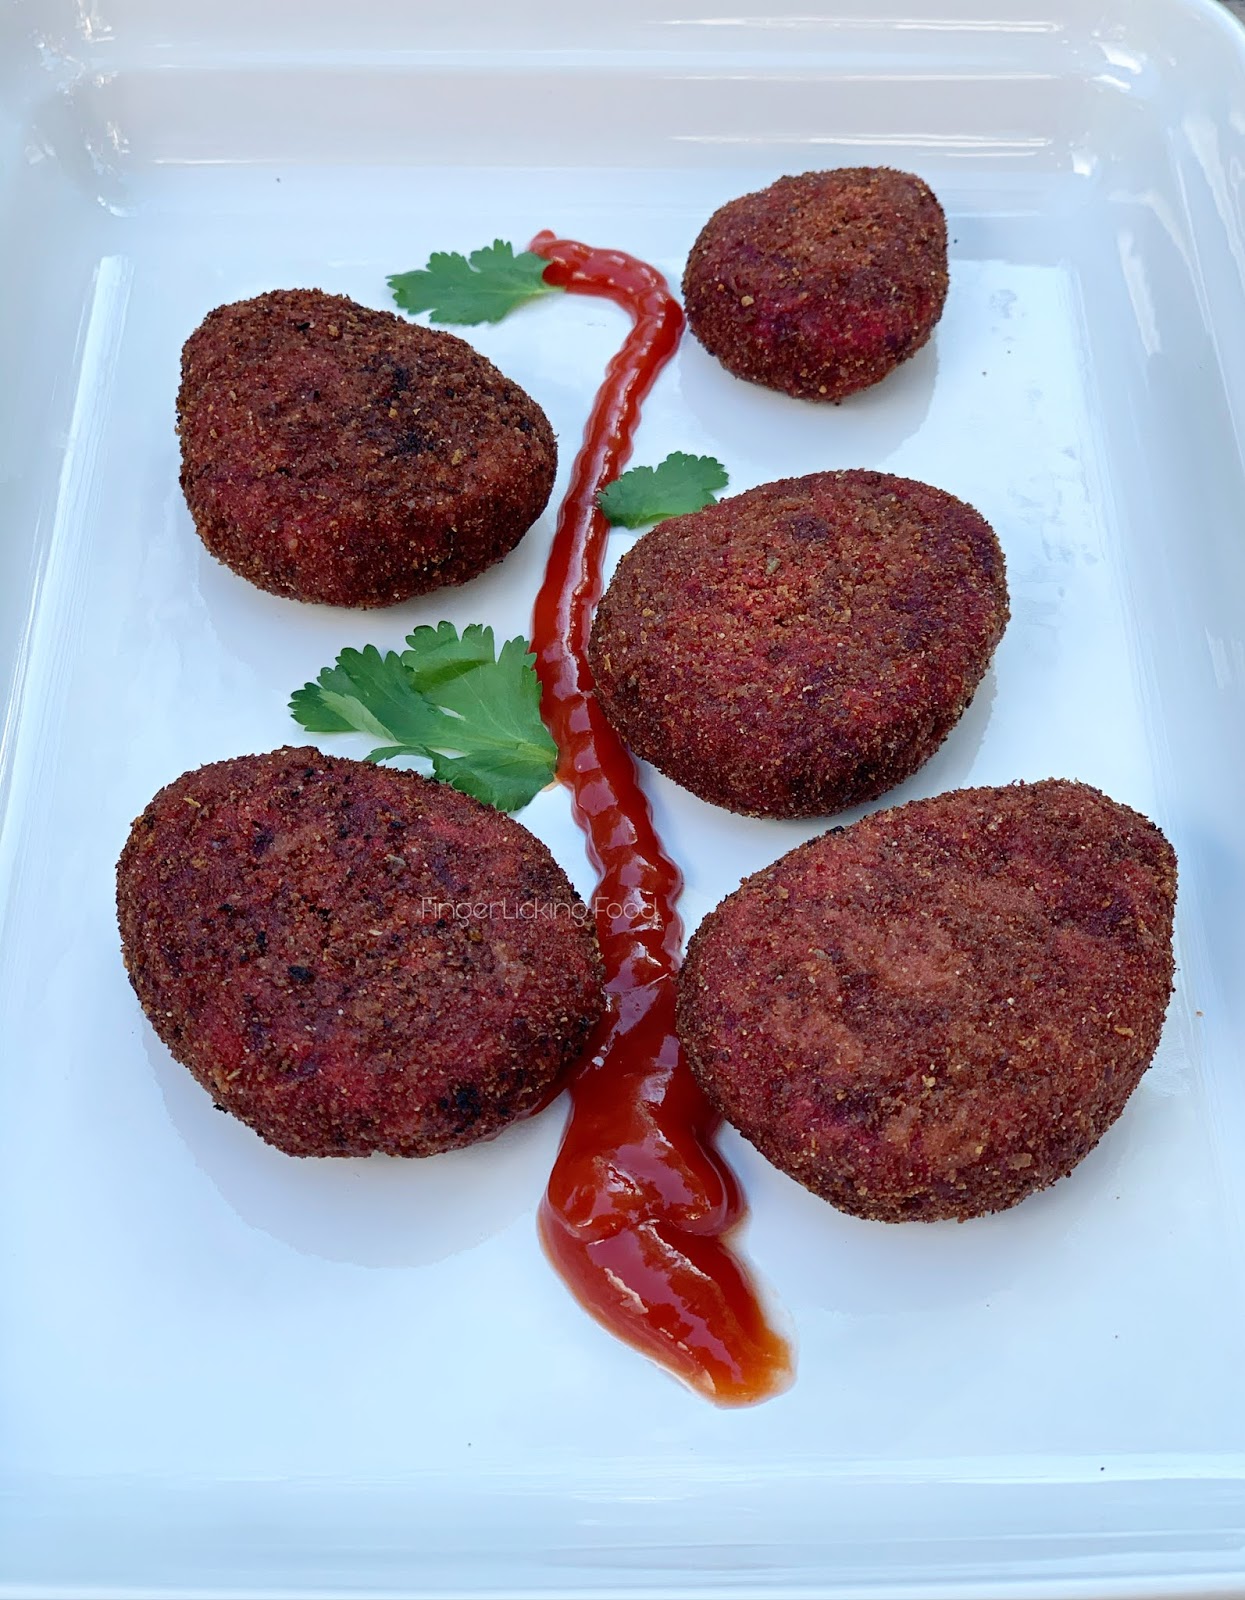
WOYP Day # 50 Beetroot Cutlets


Beetroot or Beets, are a popular root vegetable and used in many cuisines around the world. They are packed with essential vitamins, minerals and plant compounds, some of which have medicinal properties. Beetroot contains the Betalain pigment which is responsible for the deep red color. This color, vibrant and beautiful as it looks, can stain skin and clothes, so handle Beets with care. 


Beetroot Cutlets: 
You will need:

1 medium sized Beetroot
2 medium sized Potatoes
2 tsp Coriander powder
1 tsp Chili powder
1 tsp Chaat masala
1 tsp Garam masala powder
1/2 tsp Amchur powder (Dry mango powder)
2 tsp Ginger Garlic paste
Salt to taste
2 tbsp Corn starch

To coat:
2 tbsp Corn starch (mix with water to make a slurry)
Plain breadcrumbs

Oil to deep fry 

 
Boil the beetroot and potatoes separately. Peel and grate them into a large bowl. Add the coriander powder, chili powder, Chaat masala, Garam masala and salt to taste. Also add the corn starch and Ginger garlic paste and combine well. 


The mixture should be firm and hold shape. If it feels soft or sticky, add more corn starch as needed. Form into tear drop shaped patties. 


Heat oil in a deep pan and set it to medium high heat. Dip each patty into the corn starch slurry and then into the bread crumbs. 


 Turn to coat evenly and then drop into the hot oil. Fry on both sides until crisp. Drain excess oil and remove onto a paper towel lined plate. 

 
Alternately, you can shallow fry the cutlets in batches in a wide pan.

Serve hot with ketchup or Mint chutney. 


Blog Widget by LinkWithin