Showing posts with label Bread. Show all posts

WOYP Day #58 Eggless Sweet Buns (Tutti frutti Buns)


Sweet buns or Tutti Frutti buns are popular in bakeries in Karnataka. I loved these as a kid and still do enjoy them. The heady aroma hits you anytime you drive past one of these bakeries and who can resist freshly baked buns? Yum! Few weeks ago I made Khara buns (spicy buns flavored with fresh Dill) and Sweet buns were next on my list. On our last visit to Mysore, my boys tried them for the first time and were hooked. They were thrilled that I made these at home :)


Pillowy soft buns studded with sweet Tutti Frutti, it truly is heaven in every bite!! :) These are easy to make, you can use a stand mixer or mix by hand if you don’t have one. Good old kneading by hand gives you a nice arm workout! :D This recipe also doesn’t require proofing the yeast but it does need an hour and ten minutes of proofing, so make sure you plan ahead for that.

Eggless Sweet Buns:
You will need:
Makes : 6 Sweet Buns

1 1/2 cups All-purpose flour
5oz Warm water
1 tsp Instant Yeast
1/4 tsp Salt
3 Tbsp Sugar
3 Tbsp Tutti Frutti plus 1 tablespoon
2 Tbsp Olive Oil (or Vegetable oil)

1 tablespoon Unsalted Butter, softened

Combine all purpose flour with yeast, salt, sugar and tutti frutti in a medium bowl. Add warm water little at a time to form a soft, sticky dough. Add the oil and knead by hand for 6-8 minutes until a cohesive soft dough is formed. Kneading helps develop gluten which makes soft buns. 


 Place in a lightly oiled bowl and allow to double in size, about an hour.

Lightly punch the dough and turn out onto a countertop. Knead gently for 5 minutes. Divide the dough into 6 parts. Shape into buns and place on a baking sheet or a lightly greased 9” baking pan. Cover and rest for 10 minutes. 


Preheat oven to 400F. After the buns have rested, lightly brush the top of the buns with milk and sprinkle tutti frutti on top. Bake for 15-18 minutes until the top is a light brown. 


Once the buns are out of the oven. Brush the tops with melted butter. Cool well on a cooling rack before storing. 


WOYP Day # 47 Bombay Grilled Vegetable Sandwich


My first memory of digging into this robust multi layered sandwich was years ago when I was probably in high school and we went on our first ever trip to Mumbai (then Bombay) with my parents. These sandwiches are classic, popular street food in Mumbai. A stack of veggies, crunchy and soft amidst layers of buttered bread slathered with a spicy green chutney, these sandwiches are a meal in itself. 

 I’ve made these several times in all these years and realized I haven’t posted it on here. I gotta blame my blogging hiatus once every few years in the past decade :D If you've been a regular reader you would know I go MIA from blogging so I can take focus on cakes.

The green chutney used for these sandwiches is very similar to the Mint chutney we use in Chaat, except this has body to it and is thicker, and yes a whole lot spicier. The chutney has to shine through all those layers or bread and vegetables so a mild tasting chutney simply doesn’t cut it.

Green Chutney for Sandwich: 

 
You will need:

1 cup Mint leaves
1/2 cup Cilantro leaves
1/2 tsp Cumin seeds 
3 pods Garlic
1” piece Ginger, peeled
10-12 green chilies
Salt to taste
2 tsp Lime or Lemon juice
1/4 tsp Black salt


Combine these ingredients in a blender and make a smooth paste. The lime juice helps keep the chutney a nice bright green and balances the heat from the chilies. Store in an air tight container and use as needed. This Chutney can be frozen for up to 3 months.

Bombay Grilled Vegetable Sandwiches:
Makes: 2 sandwiches

6 slices large Sandwich white bread
2 tomatoes, thinly sliced
1 large potato, boiled, peeled and thinly sliced
1 Onion, thinly sliced
1 green bell pepper, thinly sliced
Salt to taste
1 tbsp Chaat masala
1/2 cup grated Mozzarella
1/4 cup softened Butter


Place 3 slices of bread in a row. Butter all 3 slices and then apply the prepared chutney. The butter prevents the chutney from soaking through the slices. If you like it spicy, apply a generous amount of chutney on each buttered slice. On one slice, place the sliced potatoes and onions. Top with a generous pinch of salt and chaat masala. Place the next slice on this. Top this slice with sliced tomatoes and bell pepper. Repeat the salt and chaat masala. Top this slice with a tablespoon or two of grated mozzarella.


 Flip the last slice over, chutney side down, to complete the sandwich assembly.Press down lightly. Apply butter on the top. Time to grill the sandwich.

Heat a Grill pan on medium high heat. Add a teaspoon of butter and spread on the pan. I have a cast iron grill pan which takes time to heat up but retains heat for a long time. Adjust heat according to the pan you use. If you have an electric grill, you can use that too. Once the pan is hot, flip and place the sandwich butter side down. 


Grill for 2 minutes until the bottom is crisp. Butter the top and flip and grill this side for another minute or two.  The butter makes a crisp toast on either side. 


Remove from heat and rest for a few seconds before slicing into 2 triangles using a sharp knife. Serve while still warm with a side of Fries or salted chips.


Couldn't resist the heady aroma of grilled bread and veggies while taking pics and had to take a bite! Yummm! :D

WOYP Day #32 Khara Bread and Khara Buns


Of late, I’ve been working on recipes that I had been meaning to tackle since years! Given that I’m not running around for the boys’ school or their activities, I’ve had considerably more time on hand or rather in one place. This of course doesn’t mean I can laze around since hungry bellies have become bottomless pits now :D I’m not complaining, I’m lucky I enjoy cooking and baking but its not the same story with many of my friends and relatives who want to be out of the kitchen asap! :)

This Khara bread has been on my list for not weeks or months but years! I finally got around to making it and definitely glad I did. I remember eating the pillowy soft Khara bread from bakeries back in Mysore. That and Toast, Honey Cake, Khara Biscuits, Benne Biscuits…yummmm! The driving force behind trying these recipes is the urge to eat them and their non-availability here! We crave those familiar flavors and smells, more so now being home all the time.
Khara means "spicy" in Kannada. 


This recipe makes one large loaf and few buns or a medium sized loaf and 6 buns. The recipe can be easily halved and is egg free. If you are making this for the first time I would highly recommend halving the recipe.

Khara Bread (or Buns): 
Makes: 2 medium loaves 


You will need:

3.5 cups to 4 cups All-purpose flour (Maida) plus more
2 tsp Active dry yeast
1 1/2 tbsp Sugar
1 tsp Salt
3/4 cup Water
1/2 cup Milk
2 tbsp Olive oil

For the flavoring:

1/2 cup finely chopped fresh Dill
1/4 cup finely chopped fresh Cilantro
1/2 cup finely chopped Onion (I used red onion)
1 tbsp Green chili paste ** (see note below)
1 tsp Cumin seeds
1 tbsp Olive oil or Vegetable oil

To brush the top of bread:

Milk as needed
Butter as needed

NOTE: I usually have a batch of green chili paste on hand, which has salt added to it (to preserve) since we use it in several south Indian recipes. I used the same quantity of this paste mentioned above but did NOT use the salt mentioned in the dough ingredients. If you make the green chili paste for this recipe then grind chilies to a fine paste and use salt as mentioned above. This is important because you don't want to over salt the bread.

Combine the water and milk and warm it (around 100F) on the stove top or a microwave. Add the sugar and yeast, stir and set aside for 10 minutes until frothy and bubbly. If you don’t see  any reaction either the liquid was not hot enough to activate the yeast or too hot to kill the yeast. In either case, you would have to start over. 

While the yeast proves, heat 1 tbsp of Olive oil in a pan. Add the cumin seeds and when it crackles, add the chopped onions and sauté until soft. Add the chopped dill and cilantro and saute for a minute until the dill loses the raw smell. Stir in the chili paste (see NOTE above). Turn off heat and cool.

Once the yeast is ready pour into the bowl of a stand mixer. If mixing by hand pour into a large bowl (enough to fit 4 cups of flour). Fit the dough hook on the mixer. Add the olive oil, salt (if using - see note regarding chili paste). Add 2 cups of flour and start the mixer on low. Add another 1.5 cups of flour and continue mixing until the dough comes together. It will be sticky. At this point add in the sautéed onion-greens mixture. Knead for a minute and then add more flour - I added about another 1/2 cup of flour until the dough came together into a soft smooth ball. Knead for 7-8 minutes. 


Transfer to a lightly oiled bowl and cover. Set aside in a warm place until doubled,  about 1.5 hours - 2 hours depending on how warm it is where you are.

Turn out onto a lightly floured surface and knead one more time by hand about 4-5 minutes. Cut dough in half, shape into a loaf and place in a greased 9”x5” loaf pan. Cut the remaining dough into 6 equal pieces and shape into buns. Place on a parchment lined baking sheet. Cover the loaf and buns loosely with a plastic wrap and allow to rise again for 40-45 minutes. 


Preheat oven to 360F close to the end of the second proof. Brush the top of the loaf and buns with milk.

Bake the buns for 15-16 minutes and the loaf for 25-28 minutes. Keep and eye on both and don’t allow the top to brown too much. Adjust baking times depending on the quantity you make and your oven.

Once the buns are out, brush the tops with melted butter. This makes for a soft crust. Do the same once the loaf is baked and out of the oven. Transfer to cooling racks and cool completely before slicing or storing.

This turned out to be a nice pleasant green on the inside with specks of dill everywhere. The taste is spot on and one bite with a slather of butter on a warm slice took me right back in time!! 


WoYP Day #25 Pesto Focaccia


Focaccia is an Italian style bread that is thick and hearty. When made with potatoes it yields a softer bread perfect for dipping or for making a sandwich.

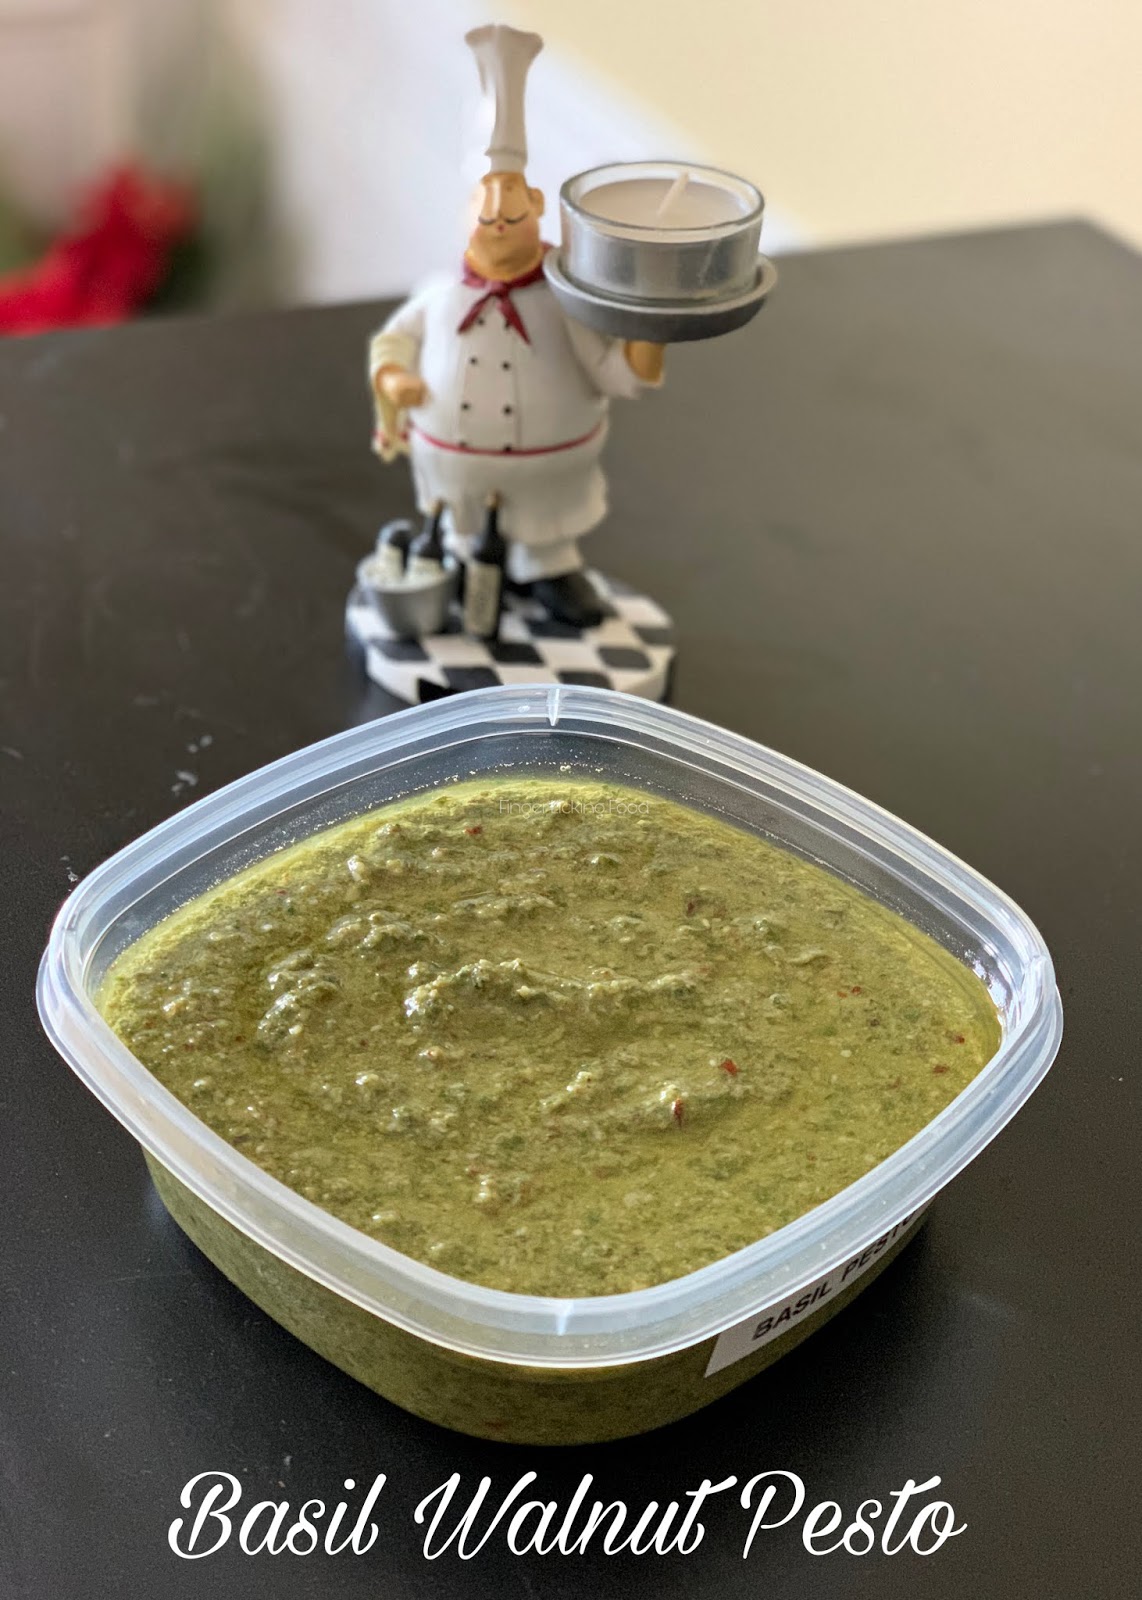
The first time I made Focaccia was for the Daring Bakers challenge several years ago. Ever since I’ve made it plenty of times with various toppings. This time I tried it with home-made Basil Pesto, cherry tomatoes and Onions. My Basil plants are growing well, and I made the first harvest yesterday and of course made a fresh batch of Basil Walnut Pesto. I’ve amped it up to suit our taste, from the first version of Pesto I’ve shared earlier. 


Pesto Focaccia:

You will need:


1 large Potato (150 gms) peeled and cubed
2 cups All-purpose flour
1 1/2 tsp Active dry Yeast
1/2 tsp Honey
1 1/2 tsp Salt
1 1/2 tbsp Olive oil
1/2 cup + 3 tbsp luke warm water

Toppings:
3 tbsp Basil Walnut Pesto (recipe follows)
Cherry tomatoes, sliced in quarters
Sliced onions
Fresh basil leaves (optional)
1 tbsp Olive oil
1/2 tsp Oregano

Boil the potatoes until tender. Drain and mash.

In a mixing bowl, add the flour, salt, yeast, honey and mashed potatoes. Combine with a spatula.If using a stand mixer, use the dough hook to combine.  Add the olive oil and then add the warm water little at a time to form a sticky dough. Turn into out onto a lightly floured surface and knead 4-6 minutes until smooth and soft. If using a stand mixer, knead on medium speed for 3-4 minutes until the dough begins to come away from the sides of the bowl. Lightly oil a bowl and place the dough in it. Cover and place in a warm place until doubled in size, about 2 hours. 


Preheat oven to 400F.

Punch the dough. Transfer to a lightly oiled 9x13” pan. Using your fingers spread the dough around gently to fit the pan. Dimple the dough with your fingertips. 


Drizzle the olive oil on top and spread using a silicone brush. Spread the pesto on top. You can arrange the tomatoes, onions  and basil leaves randomly or anyway you like, was feeling a bit creative and hence the flowers. Sprinkle the Oregano on top. 


Bake for 20 minutes. Cool in pan for 5 mins before slicing. Serve warm. 


Leftover Focaccia can be stored in air tight container for 3 days.

Basil Walnut Pesto:


You will need:

2 cups packed fresh Basil leaves (Sweet basil)
1/2 cup Walnuts
4 pods Garlic
1/2 tsp Salt
1/2 tsp Black pepper powder
1/2 tsp Red chili flakes
3/4 cup grated Parmesan cheese
1/4 cup Extra-virgin Olive oil (more if needed)

Using a food processor, blend the basil leaves, walnuts and garlic until fine. Add the salt, pepper and chili flakes. With the processor running, add the olive oil in a slow stream until everything is smooth. If the pesto feels thick add a tablespoon of oil at a time. Remove to a bowl and then stir in the grated parmesan cheese.


Transfer to a clean air tight container. Pour enough olive oil on top to cover the surface of the pesto. This prevents it from turning dark green. Store in the refrigerator and use as needed. I use it in Pasta, grilled cheese, scrambled eggs and on Pizzas. Adds the extra oomph to any dish.

What's on Your Plate? Day #11 Pull Apart Garlic Bread


This is the easiest, pillowy soft Garlic bread I’ve ever had in my life! Every bite has plenty  of garlic in it, can be served right of the pan on its own or with warm Marinara sauce. My older son loves Garlic bread and he was so pleased when I told him I’m making Garlic bread that he sat in the kitchen from start to finish watching my every move! :D 


Pull Apart Garlic Bread
Adapted from here
You will need:

1 tsp Active dry yeast (or rapid rise yeast)
1/2 cup Milk
1/4 cup Water
1/4 tsp Sugar
1 1/2 cups All- purpose flour (maida)
1/2 tsp Salt

For the garlic butter:

1/4 cup Butter, melted
1.5 tbsp finely chopped Garlic
1 tbsp finely chopped Cilantro
1/2 tsp dry Oregano
1/4 tsp Salt
1/4 tsp Chili flakes

In a pan, heat the milk and water until warm to the touch (around 100F). Set aside for a few seconds. Add sugar and yeast. Allow the yeast to proof for 10 minutes. It should be frothy, if its flat and no activity even after 10-12 minutes. You will need to start over.

In a large bowl,  whisk together flour and salt. Add the yeast mix and combine well until it comes together into a soft and slightly sticky dough. If it’s very sticky to the touch, add only a teaspoon or two of flour until it’s easy to handle. Transfer to a clean counter top and knead for 8-10 minutes until dough is smooth and silky.

Place in a lightly oiled bowl, cover and proof for an hour or until dough has doubled in size.

30 minutes into proofing time, prepare the Garlic butter - to the melted butter add the other ingredients and set aside.

Butter a 9”x5” loaf pan. Dust with flour. Gently punch the proofed dough and knead once. Divide the dough into 16-18 small balls. Dip each ball in the Garlic butter and place in the prepared loaf pan. Place each boll a few centimeters apart and place them in rows. Cover and proof for 20-25 minutes. 


Preheat the oven to 350F (180C). Bake the bread for 35 minutes until the top is lightly browned. Brush the top with plain butter as soon as the loaf is out of the oven. Cool slightly before serving. Not only was this easy to make but super easy to eat. No buttery garlic mess on the outside but rather it was all baked into the bread. The whole house smelled like Garlic and my boy was in Garlic heaven..haha! We had ours just as is and it was all gone in minutes. 

I’m working on several variations to this bread, hope to try them soon and share it with all of you. Do enjoy this garlicky goodness meanwhile! :)

Semolina Loaf & Grilled Paneer Sandwiches

Writing on here after a long time and it feels good to be back! I hadn't stopped cooking or baking :D but my cake business has taken flight over the years which demands a lot of my time and attention. And of course my 2 cherubs are no longer cherubs but budding schoolers who keep me busy when they are home. Life is busy but plenty of fun.

In between all the madness I got a chance to bake this gorgeous Semolina loaf, made using fine Indian semolina, also called Sooji/Suji. The texture is smooth and tastes scrumptious! Nothing beats the smell of freshly baked bread and this loaf lasted about a day and half before it was all gone. I made Grilled Paneer Tikka sandwiches for lunch and everyone loved it. My older son who is not too keen on Paneer, gobbled it all up because the bread tasted so good.


Semolina comes in 3 forms, coarse, fine and very fine. Coarse semolina is used to make puddings, porridges and of course the popular South Indian breakfast Upma/Kharabath, Kesaribath & Rave rotti. I use Fine Semolina to make the outer layer for Karagadabu, Obattu (Pooran Poli). It is also used in breads, by itself or combined with Bread flour. Very fine semolina or durum flour is best in baked goods and yields a fine texture.

I'm sharing the recipe for both the Semolina bread and Grilled Paneer tikka sandwiches.

Note: If you have access to Semolina flour, do use that. I used the measured quantity of fine semolina, pulsed it a few times in the blender and then proceeded with the recipe. Plan ahead and give yourself enough time since the dough has to rise twice, once after kneading and second time after shaping the loaf.

Semolina Bread: 


Yields: One 8" loaf
Time: 8-12 minutes to need, 1.5-2 hours 1st proof, 1.5-2 hours 2nd Proof, 35-40 minutes Baking 
Ingredients: 

1.5 cups Water,tepid  (70-78F)  
1 teaspoon Instant yeast
3 1/4 cups Fine Semolina flour (or fine semolina, see note above)
1 tablespoon Granulated white sugar 
1/4 cup Extra-virgin Olive Oil 
1 1/2 teaspoons Salt

Method: 

Pour the tepid water into a large mixing bowl or the bowl of a stand mixer.  Add the yeast, sugar, flour, olive oil and salt. Combine with a rubber spatula until a rough dough forms. 

Kneading:  

By hand: turn out dough onto a lightly dusted countertop(dust with semolina flour) Knead by hand lightly until the dough is smooth, shiny and elastic, about 10-12 minutes. 
By Machine: Using the dough hook on your mixer, knead on medium speed (I used speed 4 on my Kitchen Aid) until dough is smooth, shiny and elastic. About 8 minutes. 


Once kneaded, transfer dough to a lightly oiled bowl. Cover and let rise until doubled, took about an hour and 45 minutes in my kitchen. 

Grease a loaf pan (8.5" x 4') with oil. Transfer dough onto a lightly dusted countertop and using your hand, shape the dough into a rectangle. The width of the dough should be around the size of your loaf pan. Now starting from one end, roll the dough tightly. Pinch the seams and place in greased loaf fan. Cover loosely with plastic wrap and allow to proof until the dough rises just above the rim of the pan, about 1.5-2 hours.


Preheat the oven to 375 F. Place loaf on the middle rack and bake for 35-40 minutes or until loaf pulls away from the sides of the pan. The top will be a nice even brown color. 


Remove loaf from the oven once done. Cool in the pan for 10 minutes, remove and place on a cooling rack until completely cool. Loosely cover the top with a piece of aluminium foil if you want a softer crust. Slice bread once its completely cool. Store in an air-tight container or resealable plastic bag.

Grilled Paneer Tikka Sandwiches:


Serves: 6
Ingredients: 

1 cup Paneer, cubed
1/2 cup Green bell pepper, cubed
1 onion, cubed
1 Tomato, cubed
1/2 cup Thick yoghurt (curd)
1 tbsp Cooking oil (Olive oil/Vegetable oil)  
1 teaspoon Red chilli powder
2 teaspoons Corriander powder
1 teaspoon Cumin powder
1/2 tsp Amchur powder
1 tsp Garam masala
1 tbsp Cilantro, chopped
Salt to taste

12 slices Semolina bread
Mint chutney 
Mozzarella cheese, grated (optional)
Softened butter 

In a large bowl, combine the yoghurt, the spices, salt to taste. Whisk until smooth. Now add the cubed paneer, bell pepper, onions and tomato. Set aside for 10 minutes. 

Heat a wide pan, add the marinated paneer and saute for 6-8 minutes on medium heat. Stir often to prevent burning. Taste & adjust seasonings. Turn off heat and add cilantro. Cool slightly. 

Heat a grill pan on medium heat. Take 2 slices of Bread, butter one side and apply mint chutney on the buttered side. Spread a layer of the Paneer Tikka masala, top with grated cheese. 


Place the other slice on top. Spread butter on the top slice and careful flip the sandwich (butter side down) onto the heated grill pan. Using a spatula compress the sandwich, cook for 1-2 minutes until the bottom is crisp and has grill marks on it. Apply butter on the top and flip to grill the other side. 

Remove from heat, slice into triangles and serve hot with ketchup. 

These were sooo delicious, I'm glad I made a big batch of the Paneer Tikka. I see more sandwiches for lunch or dinner in the future :D If you try it, let me know!


Z for ZOPF – Swiss Braided Bread - Day 26


We are on the last day of the Mega blogging Marathon!! I can't believe I actually baked for 26 days straight :D I don't even know how this month flew by, but I do know I've gained a few pounds eating bakes from around the world. And another few pounds from just drooling over all the gorgeous bakes from my fellow bakers!

Z for ZOPF – SWITZERLAND


Zopf or Züpfe is a buttery brioche like bread popular in the Switzerland in all of its 26 cantons. Switzerland is very diverse in its culture as well as cuisine. Each canton has its own specialties but the Zopf remains popular throughout. The name Zopf is derived from its shape, and literally means “braid” or “plait”. Traditionally eaten on Sunday mornings, this loaf is next only to the popular Swiss cheese, chocolates and watches. Its shaped differently in various parts of Switzerland but for most part its braided.

History:

I found this interesting piece of history here and felt compelled to quote. Read on. 

"Its origins are fairly unclear and surrounded by many legends, some gloomy, others cheerful. Apparently, in ancient times, women used to accompany their deceased husbands into the tomb and the spirit world in order for the married couple to be reunited in death. Thankfully that dark tradition was abandoned and replaced by a new, less barbarian one. Instead of being forced to perish with her man, the widow only had to cut off her hair (usually a plait) and lay it in the grave, alongside the body of her late spouse.

Still later, the practice of offering one’s hair as sacrifice was abolished and a braided loaf was used in place of the tresses. But as there is no real proof of that custom, it is more likely that butterzopf saw the light of day in a less morbid way.

In 1256, the first bakers guild was formed in Basel, and not long after, a few more were formed in various cantons in the Helvetic territory. During the 15th century, this delicacy became very popular, as it used to be given as gifts on special occasions such as Christmas and New Year. It was even offered as a token of love or to seal a promise of marriage. Since its existence has been corroborated and documented since 1430, it is most probable that it is a Swiss invention. Nowadays, the Swiss continue the tradition of bringing a “Zopf” to their hosts to mark special occasions (public holidays and feast days).”

How’s that for some fabulous history huh? :D Now onto the bread. Its light, soft and buttery with a glossy crust.


You will need:
Makes: 1 small loaf
Recipe adapted from here

1 ¾ cups All-pupose flour plus 2 tbsp
1 tsp Dried yeast
½ tsp Granulated sugar
½ cup Whole milk plus 2 tbsp
¾ tsp Salt
2 tbsp Unsalted butter, softened
1 egg yolk plus 1 tbsp of milk for brushing the top

Warm the milk. Add the sugar and yeast, let stand for 10 minutes until frothy.

In the bowl of a stand mixer, add the flour salt and butter. Add the yeast mix and combine on low speed. Switch to a dough hook and knead until the dough comes together into a ball and is silky and smooth. Transfer to a lightly oiled bowl and cover. Allow to rise in a warm place for 1-1.5 hours.


Punch the dough and let it rest for 10 minutes.

Divide the dough into 3 and roll each piece into a long rope. Braid as shown below.


Place on a baking sheet lined with parchment paper. Cover and allow to double in size, about 30-45 minutes.

Preheat oven to 350F. Brush the top of the loaf with the egg wash, taking care to cover evenly.

Bake in the pre-heated oven for 40 minutes until golden brown and sounds hollow when tapped underneath.


Let cool on a wire rack. Slice and enjoy! 

Stay tuned for the Mega Round-up of all our bakes from the past month :) 


Check out the Blogging Marathon page for the other Blogging Marathoners doing BM# 75

Blog Widget by LinkWithin