WOYP Day # 55 Buterscotch Ice-cream (Without an Ice-cream Maker)


Butterscotch Ice-cream…brings back memories of the scoops of ice-cream we used to eat as kids -  a pale yellow ice-cream with a distinct flavor and loaded with crunchy butterscotch bits. Butterscotch here in the US is very different and the flavor doesn’t come close enough to the one back home. I set out to make my very own version of this ice-cream. It wasn’t easy adapting this flavor to another base recipe so I came up with my own, which worked beautifully! It combines a custard base with a whipped cream base which yields a smoother ice-cream which is akin to the ones made with an ice-cream maker. 


Butterscotch extract smells heavenly but it can easily get over powered by other ingredients. The idea is to add layer upon layer of the same flavor so it shines through in every bite. Making the butterscotch brittle is easy as long as you keep an eye on it and the heat is on medium to medium low.

You can churn the mix in a ice-cream maker if you have one, but this doesn’t need to be churned and can be made without an ice-cream maker. You will need a hand held beater to whip the cream.

Butterscotch Ice-cream (Without Ice-cream maker) 


You will need:

1 cup Heavy whipping cream
1/2 cup powdered sugar
1 tbsp Butterscotch Extract
A generous pinch -  Yellow Food Color powder

1/2 cup Milk
1/4 cup Sweetened Condensed milk
1 tbsp Corn starch + 2 tbsp Cold milk (combine)
2 tbsp Milk powder

For the Butterscotch brittle:

3 tbsp sugar
1 tbsp Cashewnuts, chopped
1 tsp Butterscotch extract
1 tbsp unsalted Butter
Parchment lined baking sheet or plate

Prepare the Brittle:

Heat the sugar in a non stick pan on medium heat and stir. The sugar will begin to melt, continue stirring until all the sugar is melted. Continue to heat until the color changes from light yellow to a golden yellow and then light brown. This happens fairly quickly so keep an eye. Stir in the butter and chopped nuts. Combine and remove from heat. Pour mixture onto parchment and spread it thin quickly. Allow to cool completely. The brittle will harden and peel off from the parchment easily. Using a sharp knife chop into tiny bits. 


Store in an air-tight container in a cool place. If you have a hot humid kitchen, this is best stored in the refrigerator. The brittle can be made ahead of time. 


Prepare the base:

Part 1 - Custard base

Combine the corn starch and cold milk to make a smooth paste. Set aside. Heat the milk in a saucepan. When it is warm, remove a tablespoon and combine with the milk powder until it’s smooth with no lumps. Add this to the milk and stir. Stir in the sweetened condensed milk and bring to a boil. Lower heat and stir in the corn starch paste. Continue to stir until the mixture thickens. Remove from heat and cool.

Part 2 - Whipped cream base

Chill a mixing bowl and beaters in the refrigerator for 30 mins to an hour. Once chilled, add the whipping cream, powdered sugar and Butterscotch extract to the bowl.Also add the pinch of color.  Beat on low speed for a minute and then increase speed. Whip to form soft peaks.

Slowly add in the cooled custard base to the whipped cream base and fold. Stir in about 1/2 of the prepared butterscotch bits.


Combine well and transfer to a glass container or any air tight container. Freeze for 4-6 hours or more. 


 Scoop into a bowl and top with more butterscotch bits. 


WOYP Day # 54 Shahi Aloo Gobi with Jeera Rice


I was at a Farmers Market last week and stocked  up on a bunch of fresh fruits and vegetables. This place is almost an hour's drive so I don't get to go there often. I had work in the area and made a quick detour :) What was supposed to be a quick stop turned into a 2-hour shopping spree :D I bought a bunch of colored bell peppers too, more of the red since I love how they make any dish vibrant. The beets went into making these gorgeous cutlets. We've been gorging on various fruit too ever since - Fresh figs, Plums, Raspberries, Strawberries, Grapes, luscious giant Mangoes that are super sweet, Pineapple, Watermelon (which I'm yet to cut) and all the fresh veggies. 


Made a quick and easy indulgent curry using Cauliflower, Potatoes, Peas and Red bell pepper. I say indulgent, since it is calorie rich but also laden with veggies, so i think it's alright to indulge every now and then :D 


Shahi Aloo Gobi
You will need:

1 cup Cauliflower, cut into florets
1/2 cup Potato, cubed
1/2 cup Red bell pepper, cubed
1/2 cup Green peas, fresh or frozen
1/2 cup Onion, cubed
2 tbsp Butter
1/2 tsp Cumin seeds
2 tsp Ginger Garlic paste
1/4 tsp Turmeric
1 cup Tomato Puree
1 tbsp Coriander powder
2 tsp Cumin powder
1 tsp Kashmiri Red chili powder
1 tsp Kasuthi methi
3 tbsp Cashewnut paste
2 tbsp Heavy whipping cream
Salt to taste

Boil the potatoes, cauliflower and peas until cooked but not mushy. Drain and set aside.

Heat butter in a pan. Add the cumin seeds. Add the onions and sauté until soft. Add the ginger garlic paste and turmeric. Cook until fragrant. Add Now add the tomato purée, turmeric, coriander powder, cumin powder, Kashmiri red chili powder and salt to taste. Combine and cook for 5-6 minutes. Add 1/2 cup water, the boiled veggies, red bell pepper and kasuthi methi. Combine, cover and simmer for another 4 minutes. Stir in the cashew paste and the cream. Cook for a minute and turn off heat. This will thicken the gravy and make it creamy and delicious! 


Shahi Aloo Gobi goes well with Jeera Rice or Chapatis/Rotis.

Jeera Rice:

Traditionally Jeera rice is long grained rice cooked with cumin seeds and little salt. I make it with onions, green chilies and ginger garlic paste to elevate the flavors. 


You will need:

1 cup Basmati rice
1.5 cups Water
2 tbsp oil
1 tsp Cumin seeds
3 Green Chillies, slit
1/2 Onion thinly sliced
2 tsp Ginger Garlic Paste

Wash the basmati rice until the water runs clear. Soak in water for 30 minutes.

Heat oil in a pressure cooker. Add the cumin seeds. Saute for few seconds and then add the green chillies and ginger garlic paste. Add the sliced onions and cook until soft. Drain the soaked rice and add it with the measured quantity of water. Season with salt to taste. Stir and raise the heat to high. Close the cooker lid and allow the steam to rise. Place weight on the cooker lid and lower heat to low. Cook for 10 minutes and turn off heat. Rest for 5-6 minutes before opening the lid. Stir rice gently to combine and then serve. This method of cooking ensures perfectly cooked fluffy rice.

WOYP Day # 53 Spinach Corn Soup


We have had rainy, stormy days every now and then. Gloomy and cloud laden skies today, and plenty of rain. Though it is still warm outside, it felt like a Soup kind of day :) Spinach and Corn make a great combination in soup. This soup is light and is perfect with a sandwich to make a meal. 


Spinach Corn Soup: 

You will need: 

2 cups chopped Spinach
1/2 cup Yellow corn kernels (from a can, drained)
2 pods Garlic, finely chopped
2-2 1/2 cups water
1 tbsp Corn starch
Salt to taste
1/2 tsp Black pepper powder
2 tsp light Soy sauce

Salt to taste
1 tsp Sugar
2 tsp Oil


Heat oil in a saucepan. Add the chopped garlic and sauté until fragrant but not browned. Add the chopped spinach and corn. Cook for a minute until the spinach wilts but is still green, and then add water. Stir and then add the salt, pepper, soy sauce and sugar. Combine well and bring to a boil.Add little salt at a time, since the soy sauce is also salty.  Prepare a slurry of the corn starch using little water. Add to the boiling soup and stir. This will thicken the soup. Simmer and then turn off heat. Serve hot. 

That's it! A simple and heart warming soup for any season.

WOYP Day # 52 Paneer Tikka (in oven)


Paneer Tikka is a popular appetizer in Indian restaurants, often made in a large Tandoor, which is traditionally a clay oven.  A Tandoor has very high temperatures going up to almost 900 F. The intense heat, comes from a coal fire which is at the bottom. This heats the wall and insides of the oven, allowing food to cook evenly and faster too. An array of foods are cooked in the Tandoor - indian breads like Naan, Roti, a variety of tikkas including Paneer and veggies and a large variety of meats. The clay oven and coal impart a signature smoky flavor to foods cooked in the Tandoor. 

Paneer Tikka cooked in the Tandoor is done using long metal skewers. Cooking in a Tandoor is an art in itself and often there is an assigned chef or cook who is solely responsible for handling Tandoor dishes in restaurants. 

To recreate the same dish at home, neither do we have ovens that go up to 900 F nor is it feasible to have a coal fire all the time (unless you have an outdoor coal grill). So the closest in taste is baking the Paneer and veggies first and then broiling them to give them a char. 


Paneer Tikka:
You will need:

200 gms Paneer, cut into large cubes
Oil 2-3 tbsp
1/2 cup cubed Green bell pepper
1/2 cup cubed Red bell pepper
1/2 cup cubed Yellow bell pepper
1/2 cup cubed Onion

1 tsp Chaat masala
Mint chutney
Thinly sliced onions to serve

Marinade:

1/2 cup Plain yoghurt
1 tbsp Coriander powder
2 tsp Cumin powder
1 tsp Red chili powder
1/2 tsp Chaat masala
1/4 tsp Turmeric
3/4 tsp Salt
1/2 tsp Kasuthi Methi (crushed)

Wooden or Metal Skewers
Foil lined baking sheet

In a medium bowl whisk together the marinade ingredients. Add the cubed paneer, bell pepper and onion. Combine well to coat evenly. Set aside for 2-3 hours or for at least an hour.

Preheat oven to 425 F.

Lightly oil a foil lined baking sheet. Skewer the paneer, bell pepper and onions alternately on the wooden or metal skewer. Place on the oiled baking sheet. Brush more oil on the paneer and veggies. 


Bake for 6 minutes and then place under broiler for 2-3 minutes. This will char the veggies and Paneer. 


Remove from the oven and rest for 3-4 minutes before lifting the skewers off the pan. If you try to remove them right out of the oven the Paneer will rip off the skewer. 


Gently slide veggies and Paneer off the skewers. Sprinkle chaat masala on top and serve with Mint chutney and thinly sliced onions. 


 Savor the soft & spicy Paneer with the crunchy broiled veggies. Yum! :)

WOYP Day # 51 Instant Spinach Rava Idlis


Rava Idli is a popular breakfast dish in Karnataka. Rava idlis can be made instantly, which means there is no need to soak, grind or ferment to make the batter. It’s very easy to make the Rava idli mix at home with Semolina or Rava and it tastes a lot better than the instant mixes available on the market. Spinach Rava idlis are a variation to these Idlis. 

  
You will need:

2 cups Semolina (Upma Sooji)
3 tbsp Oil
1/2 tsp Mustard seeds
1 tsp Chana dal
Few curry leaves, chopped
2 tsp Salt

For the Idli batter:
Prepared Rava idli mix
4 cups Plain yoghurt thinned with 1 cup water to make 5 cups in total
2 tsp Fruit salt  
1 cup finely chopped fresh Spinach

 
Heat oil in a pan. Add the mustard seeds and when it begins to splutter add the chana dal and curry leaves. Sauté for a few seconds and then add the measured quantity of Rava. Combine and roast for 3-4 minutes until fragrant. Turn off heat and allow to cool.

Once cooled add the chopped spinach to the prepared rava idli mix and combine. 


Add 2 cups of yoghurt. Mix well and set aside for 2 minutes. Now add the remaining yoghurt and mix well. The batter should be in pourable consistency. Lastly add the fruit salt and mix vigorously to lighten the batter. This yields soft and fluffy idlis. If the batter feels thick and dense, add 1/4 tsp more of the fruit salt and combine until batter feels light. 


Grease idli plates with little oil. Add 1/4 cup batter to each mold.Steam in a pressure cooker or idli cooker for 10 minutes. Cool for a few minutes before de-molding. Repeat with the remaining batter.

Serve hot with Bombay Gojju.

WOYP Day # 50 Beetroot Cutlets


Beetroot or Beets, are a popular root vegetable and used in many cuisines around the world. They are packed with essential vitamins, minerals and plant compounds, some of which have medicinal properties. Beetroot contains the Betalain pigment which is responsible for the deep red color. This color, vibrant and beautiful as it looks, can stain skin and clothes, so handle Beets with care. 


Beetroot Cutlets: 
You will need:

1 medium sized Beetroot
2 medium sized Potatoes
2 tsp Coriander powder
1 tsp Chili powder
1 tsp Chaat masala
1 tsp Garam masala powder
1/2 tsp Amchur powder (Dry mango powder)
2 tsp Ginger Garlic paste
Salt to taste
2 tbsp Corn starch

To coat:
2 tbsp Corn starch (mix with water to make a slurry)
Plain breadcrumbs

Oil to deep fry 

 
Boil the beetroot and potatoes separately. Peel and grate them into a large bowl. Add the coriander powder, chili powder, Chaat masala, Garam masala and salt to taste. Also add the corn starch and Ginger garlic paste and combine well. 


The mixture should be firm and hold shape. If it feels soft or sticky, add more corn starch as needed. Form into tear drop shaped patties. 


Heat oil in a deep pan and set it to medium high heat. Dip each patty into the corn starch slurry and then into the bread crumbs. 


 Turn to coat evenly and then drop into the hot oil. Fry on both sides until crisp. Drain excess oil and remove onto a paper towel lined plate. 

 
Alternately, you can shallow fry the cutlets in batches in a wide pan.

Serve hot with ketchup or Mint chutney. 


WOYP Day # 49 Moong Dal Parathas


Yellow Moong is Whole Green Moong that is split and skinned. When cooked it has a mellow, creamy taste. Yellow Moong dal can be used to make Spinach Dal, Moong Dal Payasa and even a traditional South Indian side dish made with soaked moong dal - Kosambari . I made a paratha filling with the versatile Moong for these Moong Dal Parathas


Moong Dal Parathas:
You will need:

For the Moong filling:

1 cup Yellow Moong
2 tbsp Oil
1/2 tsp Cumin seeds
1/2 cup onion, finely chopped
2 tsp Ginger Garlic Paste
1 tbsp Coriander powder
2 tsp Cumin powder
2 tsp Kashmiri Red chilli powder
1 tsp Red chili powder
Salt to taste
2 tbsp Chopped Cilantro


For the dough:

2 cups Whole wheat flour
1 tsp Salt
1 tbsp Oil
Warm water as needed

Make the dough:

Combine the wheat flour, salt and oil in a medium bowl. Slowly add warm water as needed to make a slightly soft dough. Knead for few minutes. Cover and rest for 15-20 minutes. Meanwhile prepare the filling.

Make the Filling:

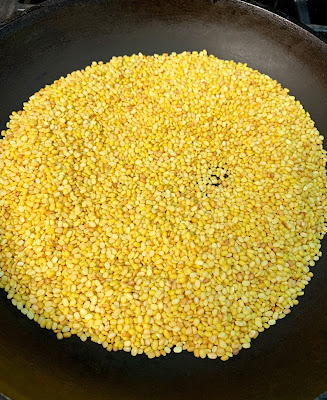
Dry roast the moong in a pan until light brown and fragrant. Remove from pan immediately since it continues to brown in the pan and burnt moong doesn’t taste good! 


Pressure cook the moong for 2-3 whistles and allow to cook. If cooking on stove top use enough water and cook until moong is soft. Drain the water.

Heat oil in a pan. Add the cumin seeds once the oil is hot and then add the chopped onions. Sauté until soft. Add the Ginger garlic paste. Cook for a few seconds until fragrant. Now add the spice powders - coriander, cumin and both the red chili powders. Add salt to taste and cook well. Cook for 2-3 minutes on medium until the spices are fragrant. Now add the drained moong dal and combine. Cook until the moong dal mixture is slightly dry and can be rolled into a ball. Add chopped cilantro and combine. Turn off heat and cool the filling before using.

Method to make the Parathas:

Knead the rested dough for few minutes until soft and smooth. Divide into 10-12 equal balls. Make small balls of the cooled filling.

Flatten a ball of dough and using your thumb and fingers form a cup. Place a ball of filling in the cup and gather the dough around the filling and seal on top. Remove any excess dough. 


Dredge the ball in wheat flour and roll gently into a thick disc using a rolling pin. Take care to roll gently and with even pressure so that the filling spreads evenly. Parathas are usually thick but I prefer to make them a little thinner, but definitely thicker than Chapatis.

Heat a pan on medium heat. Roast one side for 1 minute, apply little butter and then flip to cook the other side until lightly browned. 


Remove from heat and serve hot with Raita and Pickle. 


These Moong Dal parathas are great for lunch boxes or to carry on a picnic, they remain soft and taste good even when cold.

WOYP Day # 48 Roasted Almond (Eggless) Chocolate Ice Cream


We've had plenty hot days here in Atlanta already and my boys are constantly asking for cold stuff to cool them off. We've had our fair share of ice-creams and desserts but its never enough!! :D I'm a big fan of Chocolate Ice-cream and Almonds on Chocolate ice cream is one of my favorite toppings. Crunchy nuts in every bite of creamy chocolatey goodness mmmm..! Once you have the right ice cream base, the mix-in options and possibilities are endless. I’ve used roasted Almonds (roasting instructions below) but you can use mini chocolate chips, mini marshmallows, roasted cashew nuts and pretty much anything you want :) This is an easy Eggfree Chocolate ice-cream. 

 
I’ve switched to using Organic Cacao Powder ever since our local Costco began selling it last year. Cacao powder is made from beans that are fermented but not roasted. These beans are processed at a lower temperature and then milled into a powder. This yields a bitter, more nutritionally rich powder. Cocoa Powder on the other hand is made from beans that have fermented and roasted, typically processed at much higher temperatures. This yields a slightly less bitter, darker powder which has lost some of its nutritional value. I’ve used Cocoa powder for a very long time but I’m loving Cacao powder. I use it extensively in baking, frostings, ice-creams, smoothies. It yields a rich tasting end product and I’m glad I made the switch. Cost wise it has been pretty effective and not expensive. If you come across this, grab a bag and you won’t regret it. 

 
The end result will taste only as good as the ingredients you use. So make sure to use organic ingredients if available. I’ve also used an Ice-cream maker but if you don’t have one, I’ve included no-churn instructions too. 
 
Roasted Almond Chocolate Ice- Cream
You will need:

7 oz Condensed Milk
1/4 cup Organic Cacao Powder *
1 1/4 cup Heavy Cream
1/4 cup Whole Milk
2 tsp pure Vanilla extract
1/4 Roasted Almonds, chopped (instructions below)

*If you don’t have Cacao Powder you can substitute with a good quality unsweetened Cocoa powder.
 
In a saucepan, combine the condensed milk, whole milk and Cacao powder. On low heat whisk to combine until smooth and slightly thickened, about 3 minutes. Turn off heat and allow to cool. This ensures the cacao powder dissolves well and there is no powdery residue mouth feel once the Ice-cream is churned.


To this, add the Heavy cream and vanilla extract. Combine well. Transfer to a container and chill for 6-8 hours or overnight. Churn in ice-cream maker as per manufacturer instructions. Half way through churning, stir in the chopped roasted almonds. Transfer to an air-tight container and freeze for 4 hours or overnight.

No-churn instructions: (No ice-cream maker)
 
In a saucepan, combine the condensed milk, milk and Cacao powder. On low heat whisk to combine until smooth and slightly thickened, about 3 minutes. Turn off heat and allow to cool completely.

Chill a large bowl and beaters for 20 minutes. Pour whipped cream into chilled bowl. Add vanilla and beat on medium low speed until soft peaks form.  To this gently stir in the cooled Cacao-condensed milk mixture. Combine gently using a spatula. Chill this mixture for 20 minutes and then rewhip using a hand held beater until thick and stiff. Add the chopped nuts and fold in gently.  Transfer to an air-tight container and freeze for 4 hours or overnight. 


To Roast Almonds:

Place nuts evenly on a small baking sheet or pan. Place in a 335F pre-heated oven. Bake for 5 minutes, stir nuts and return for another 2-3 minutes. Keep an eye on the nuts if they are browning too quickly remove from the oven and transfer nuts to a plate immediately. Nuts continue to cook if left on the hot baking sheet. 


To serve:

Set the ice-cream out on the countertop for 2-3 minutes before scooping. Scoop into bowls, top with more chopped roasted almonds and this super awesome, easy Hot Fudge sauce. This is sure to transport you to Chocolate Heaven! :D 


WOYP Day # 47 Bombay Grilled Vegetable Sandwich


My first memory of digging into this robust multi layered sandwich was years ago when I was probably in high school and we went on our first ever trip to Mumbai (then Bombay) with my parents. These sandwiches are classic, popular street food in Mumbai. A stack of veggies, crunchy and soft amidst layers of buttered bread slathered with a spicy green chutney, these sandwiches are a meal in itself. 

 I’ve made these several times in all these years and realized I haven’t posted it on here. I gotta blame my blogging hiatus once every few years in the past decade :D If you've been a regular reader you would know I go MIA from blogging so I can take focus on cakes.

The green chutney used for these sandwiches is very similar to the Mint chutney we use in Chaat, except this has body to it and is thicker, and yes a whole lot spicier. The chutney has to shine through all those layers or bread and vegetables so a mild tasting chutney simply doesn’t cut it.

Green Chutney for Sandwich: 

 
You will need:

1 cup Mint leaves
1/2 cup Cilantro leaves
1/2 tsp Cumin seeds 
3 pods Garlic
1” piece Ginger, peeled
10-12 green chilies
Salt to taste
2 tsp Lime or Lemon juice
1/4 tsp Black salt


Combine these ingredients in a blender and make a smooth paste. The lime juice helps keep the chutney a nice bright green and balances the heat from the chilies. Store in an air tight container and use as needed. This Chutney can be frozen for up to 3 months.

Bombay Grilled Vegetable Sandwiches:
Makes: 2 sandwiches

6 slices large Sandwich white bread
2 tomatoes, thinly sliced
1 large potato, boiled, peeled and thinly sliced
1 Onion, thinly sliced
1 green bell pepper, thinly sliced
Salt to taste
1 tbsp Chaat masala
1/2 cup grated Mozzarella
1/4 cup softened Butter


Place 3 slices of bread in a row. Butter all 3 slices and then apply the prepared chutney. The butter prevents the chutney from soaking through the slices. If you like it spicy, apply a generous amount of chutney on each buttered slice. On one slice, place the sliced potatoes and onions. Top with a generous pinch of salt and chaat masala. Place the next slice on this. Top this slice with sliced tomatoes and bell pepper. Repeat the salt and chaat masala. Top this slice with a tablespoon or two of grated mozzarella.


 Flip the last slice over, chutney side down, to complete the sandwich assembly.Press down lightly. Apply butter on the top. Time to grill the sandwich.

Heat a Grill pan on medium high heat. Add a teaspoon of butter and spread on the pan. I have a cast iron grill pan which takes time to heat up but retains heat for a long time. Adjust heat according to the pan you use. If you have an electric grill, you can use that too. Once the pan is hot, flip and place the sandwich butter side down. 


Grill for 2 minutes until the bottom is crisp. Butter the top and flip and grill this side for another minute or two.  The butter makes a crisp toast on either side. 


Remove from heat and rest for a few seconds before slicing into 2 triangles using a sharp knife. Serve while still warm with a side of Fries or salted chips.


Couldn't resist the heady aroma of grilled bread and veggies while taking pics and had to take a bite! Yummm! :D

WOYP Day # 46 Belgian Chocolate Mousse Pudding


I’m very often left with a ton of cake scraps or trimmings, after I’ve made custom cakes, and my boys rarely leave much behind for me to make anything out of it but there is a rare occasion now and then when I need to put it to good use. I’ve made Cake Truffles before, and used Vanilla cake scraps in a Trifle Pudding.

We met up with friends over the weekend for lunch and I took this as dessert. Chocolate cake layered with a rich Belgian Chocolate Mousse and topped with fresh strawberries and more crumbled cake. 


I didn’t want to call this a Chocolate Mousse cake since I’m not baking a layer of cake as the base but using cake crumbs instead. So I felt it was a pudding. Either way, it turned out great and every one loved it! Having said that, you can bake this rich Chocolate Cake and use that as a base instead.

It is important to use good quality chocolate in this mousse, since there are only 3 ingredients and the chocolate flavor shines through well. The mousse will taste only as good as the chocolate you use. I used Cote D’or Belgian Milk Chocolate. Use a fine quality bar chocolate and you are good to go. Do not use chocolate chips. 


Belgian Chocolate Mousse Pudding:  
 
For the Cake base:
You will need:

3 cups Chocolate cake crumbs
1 tbsp Chocolate icing *

*If you don’t have icing use a 2 tablespoons of melted chocolate

Set aside 2 tablespoons of the cake crumbs for topping. Combine the remaining cake crumbs and icing (or melted chocolate). The mixture when squeezed in your palms should hold shape. If it is still crumbly then add more icing or melted chocolate. Press this mixture evenly in a deep pan or glass dish. I used a Pyrex glass container. Chill for an hour. I went ahead with the mousse and chilled after assembling all the layers since I was pressed for time.

For the Mousse: 
You will need:

6 oz Belgian chocolate Dark/ Milk or Semi-sweet chocolate, finely chopped
1 tbsp Unsalted butter
1 cup cold Heavy whipping cream (36%-46% fat)
1 tsp pure Vanilla extract

Heat 2 inches of water in a deep pan. Bring to a simmering boil. Meanwhile place the mixing bowl and beaters in the refrigerator to chill.

Add the chopped chocolate and butter in a glass bowl. Set the bowl on the simmering water taking care the water doesn’t touch the bowl. Stir to melt the chocolate and butter until smooth and shiny. Remove from heat and set aside to cool. 


Whip the heavy cream in the chilled bowl with the vanilla until soft peaks form. Add little bit of this whipped cream into the melted chocolate and fold to lighten the chocolate. Add the remaining whipped cream and gently fold to combine well until no streaks remain.
Spread the mousse over the cake base and smooth the top. 


Top with sliced strawberries and the reserved cake crumbs. Chill for 3-4 hours or more. Slice and serve. Since I had to travel 40 minutes with the pudding in the sweltering Atlanta heat, I froze the pudding for 2 hours before we started so that the mousse wouldn’t start melting and once we reached my friend’s place, it was in the refrigerator until ready to eat. It was perfect to slice! 


The next time you have leftover cake (if that ever happens in your house :D) do give this a try!

Blog Widget by LinkWithin